Hello#
Today is the day for a topic I should have written about months ago 😌
What is VPN?#
Your cousin in Finland can freely access every website, application, game, music, movie - in short, anything on the internet. But in your country, a new website access block is added every day 😔 You think, "I wish I could be next to my cousin, I could connect to his internet and it would be great." 🥺 Your cousin says, "We can do such a thing. You'll connect to me through a virtual network, just as if you were right next to me, you can use my internet" and how happy you are 🥳 So you're physically connected remotely to a virtual network. 🐵
Why Don't We Use Paid VPN?#
If you have money and little time, then use it by all means, dear reader 🐸 Although some VPNs seem cheap, they're not very reliable in terms of data security. Even if they say they don't sell your data, it's often a "We sell, sir, we sell, we sell very easily" policy. 😅 I'm not a privacy paranoid, but "Don't lose both your money and your data."
Installation#
- If you don't have an account, create an Amazon account.
- OpenVPN Access Server Click Continue to Subscribe

-
Accept the License Agreement
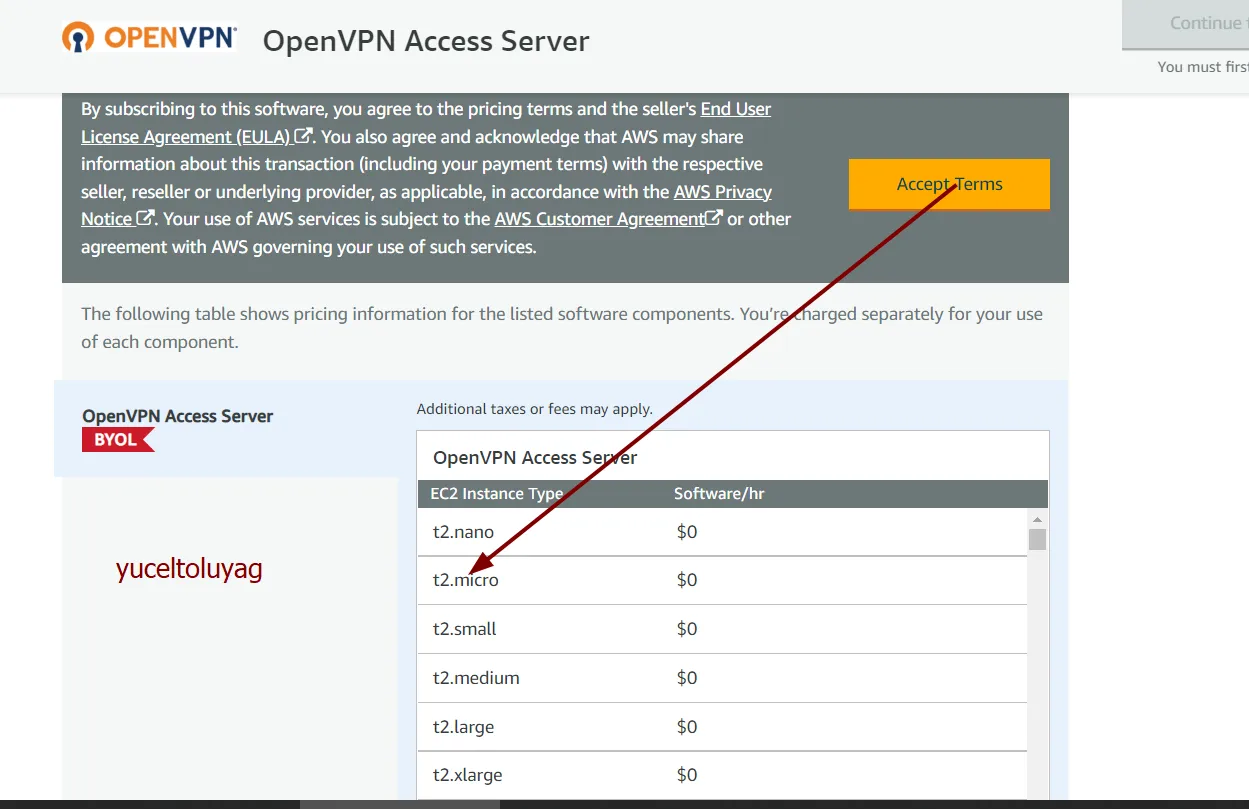
-
The license information will appear as in the image. Click Continue to Configuration and proceed
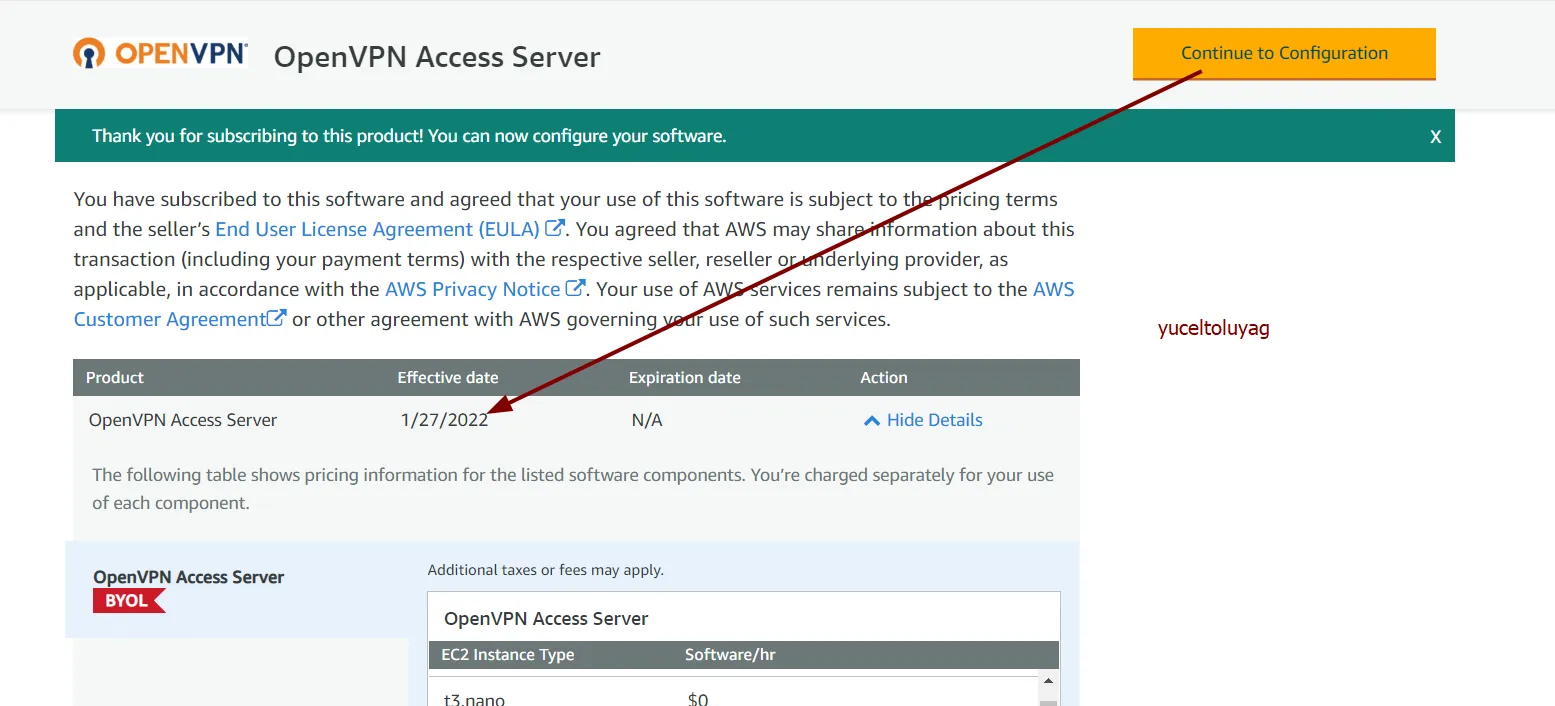
-
Select software version and choose Germany Frankfurt region as location. Then click Continue to Launch.
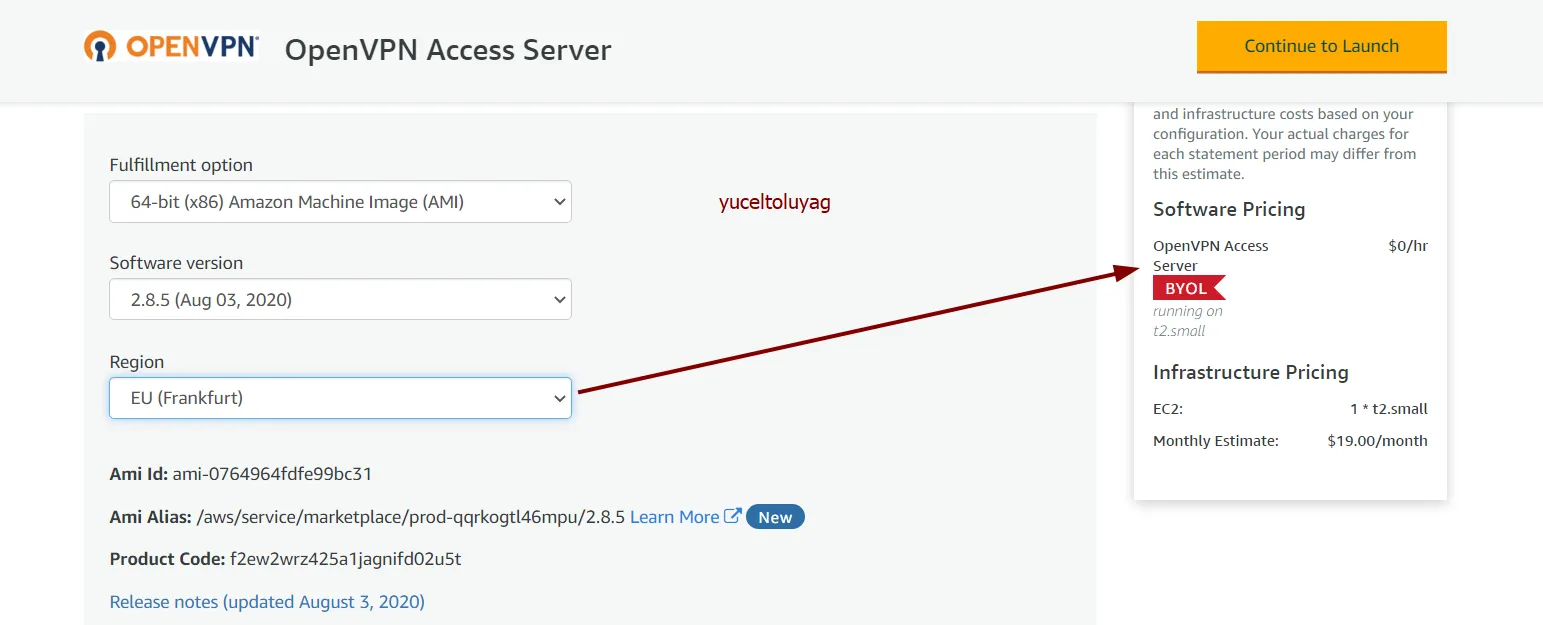
-
Our selections in the new form should be as follows:
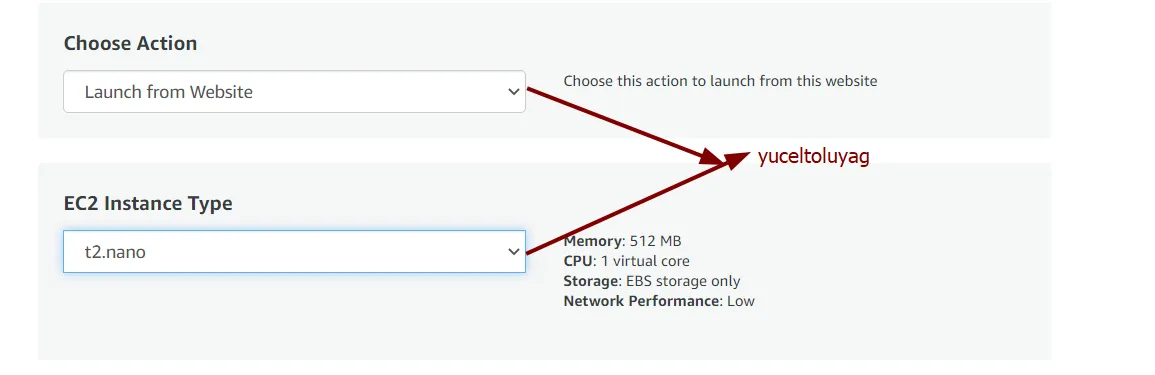
-
You need to create Security Group Settings and Key Pair Settings. I gave my daughter's name 🏌️♂️
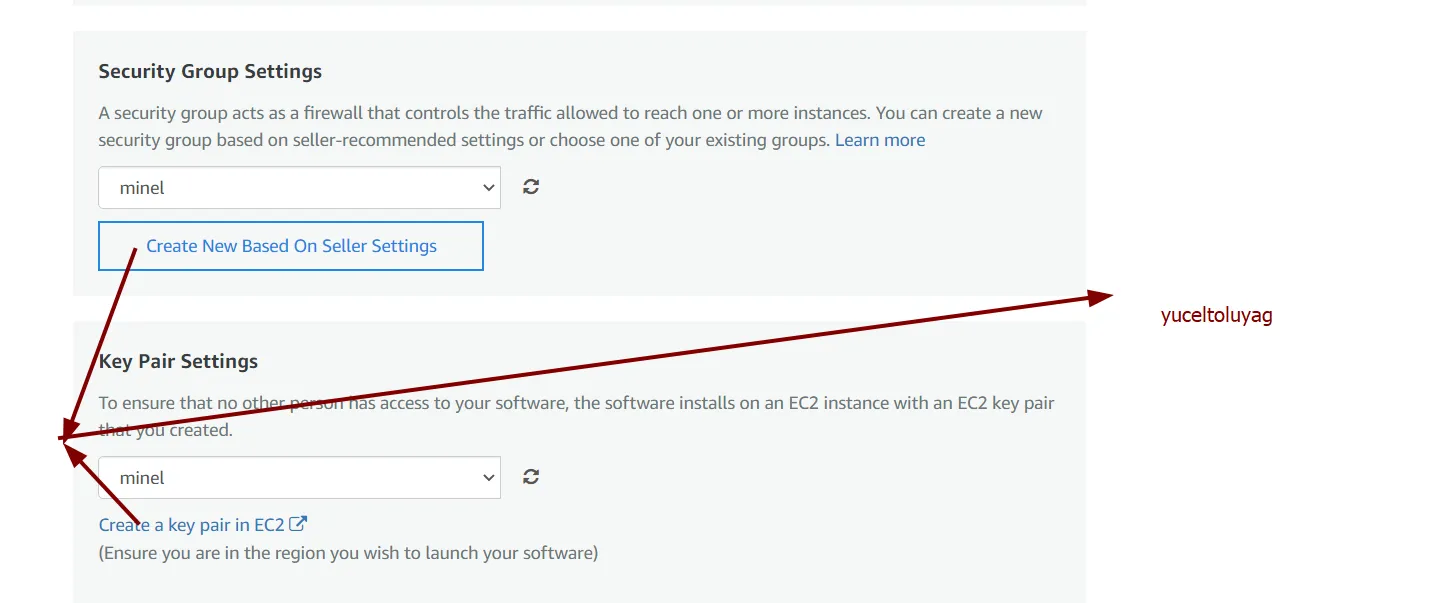
Let me also show an example of the key creation process
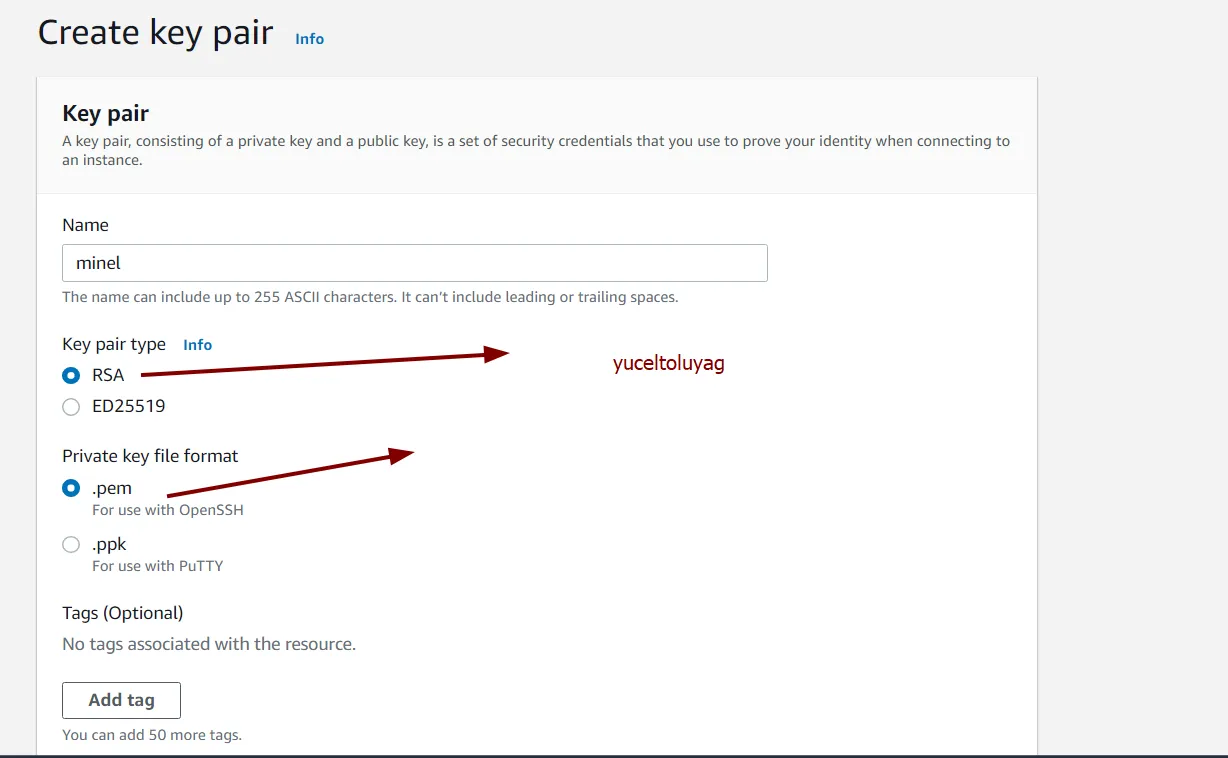
"ED25519" keys can only be used on Linux and Mac. So we selected RSA. After saving, your pem file will be downloaded. Don't lose it, keep it safe, don't show it to anyone 😉
-
Security part is as follows:
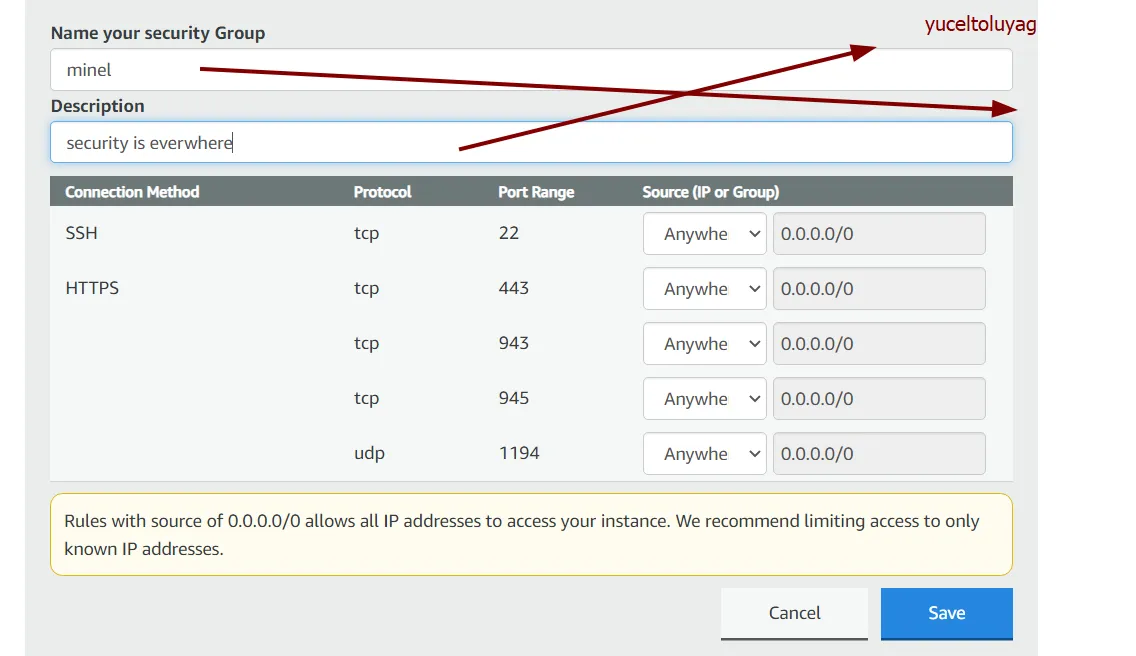
You can write whatever you want for name and description. To increase VPN security, you may want to restrict access to these ports to a specific IP address or address block (like your own ISP's). However, if your IP address changes frequently, restricting the ports may not be sufficient. Your VPN will need SSH keys to connect, and the OpenVPN server will be password protected as well. If you don't have other specific security goals, it's fine to accept the default settings for now. Let's continue with Launch.
-
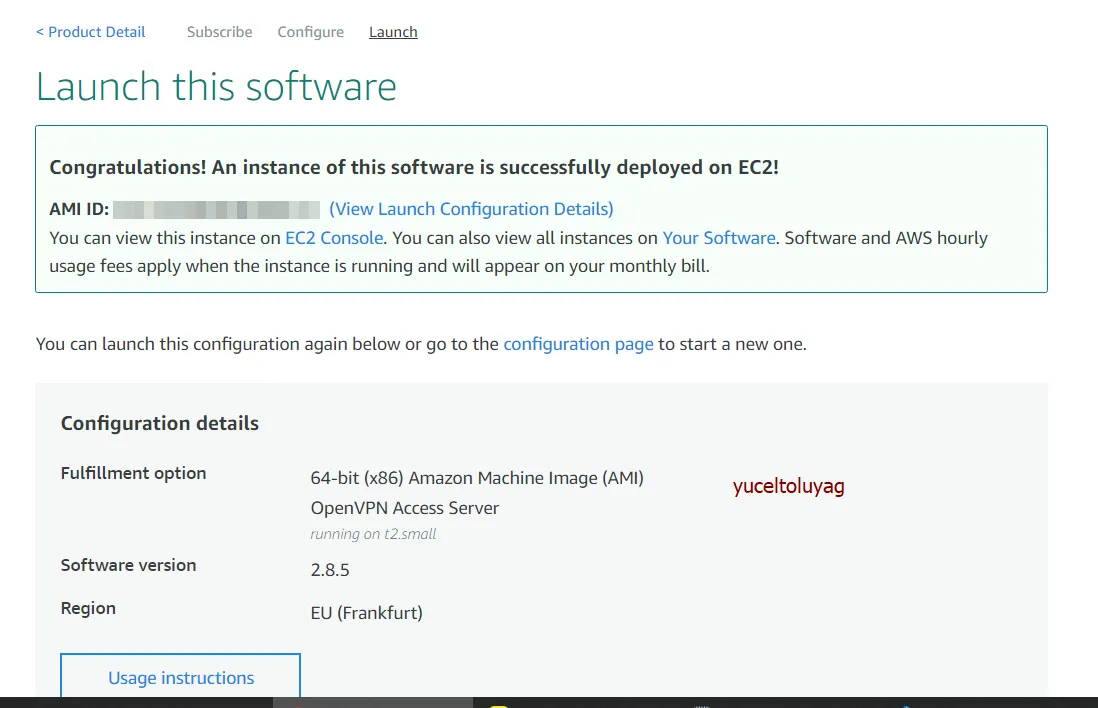
Ta da, machine installation is complete
DNS LEAK#
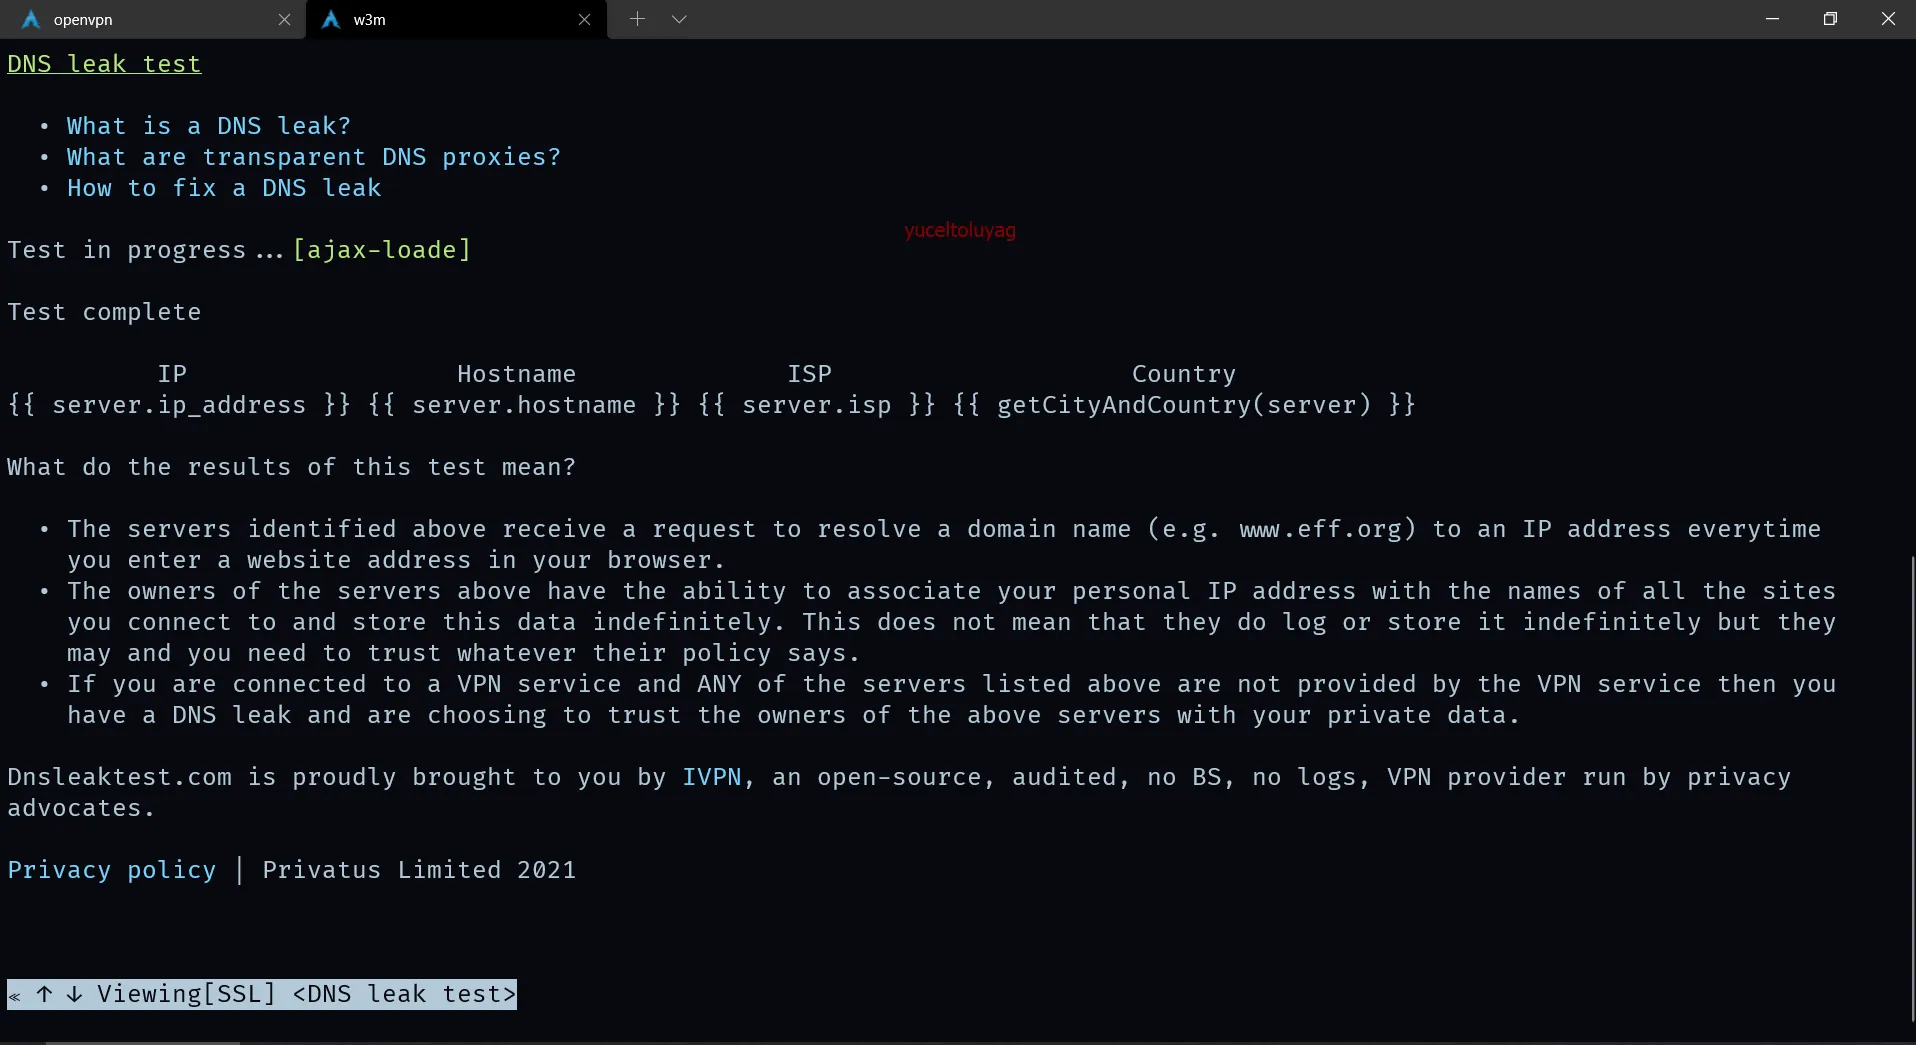
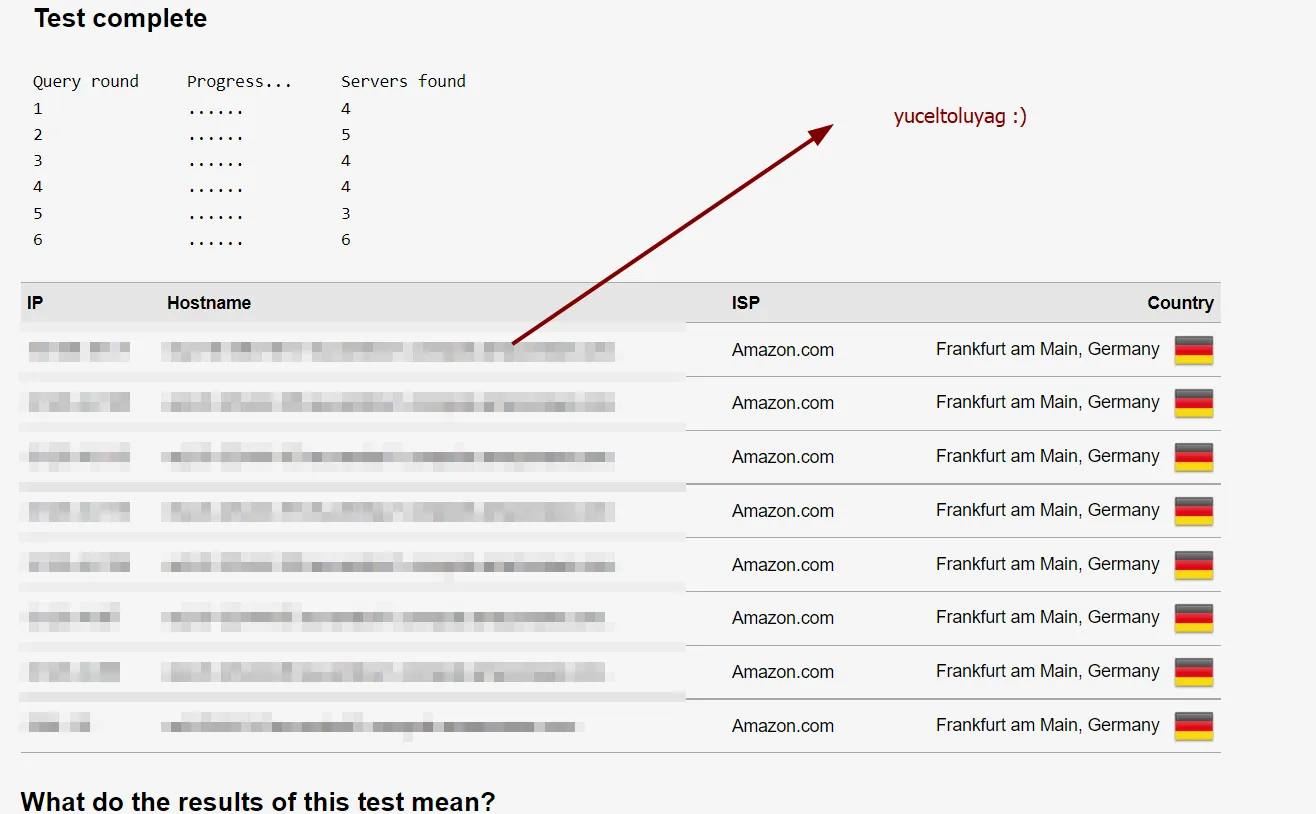
When we connect to cousin's network, when we make a request to a site, our DNS addresses are still requesting from our own ISP. Attackers usually create fake websites and can collect many pieces of information such as your IP address, location, operating system, etc. with analysis services. Even if the other party can't do anything after getting your IP address, they can attack you and disturb your peace. Now I'm giving you an address where you can automatically do DNS Leak test when VPN is open 😁 dnsleaktest.com You just need to enter the site and do Extended test. This image shows the test of a cheap, free VPN 😆 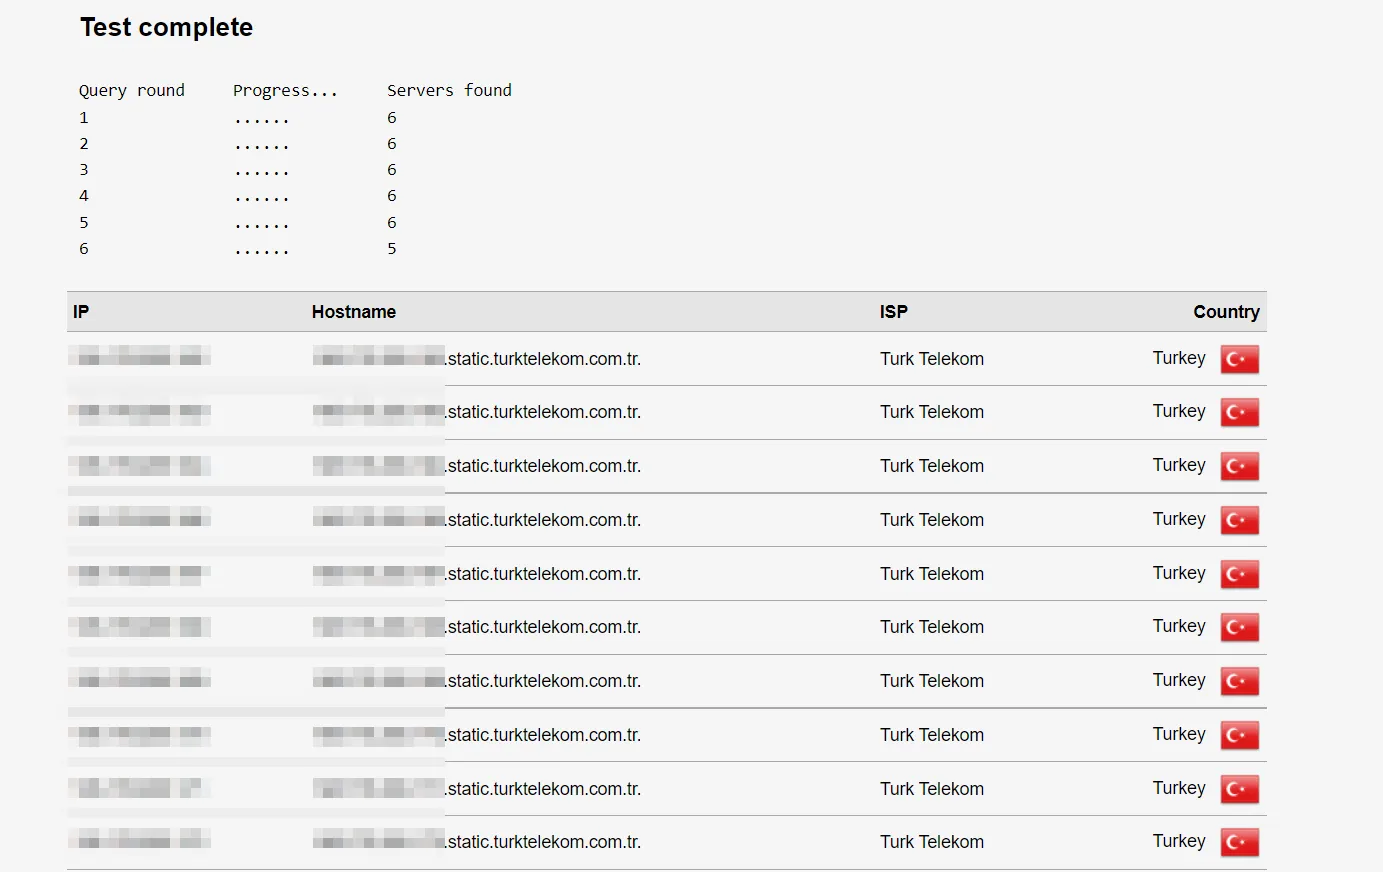 So what can they do with this? You can read from the bonus section if you want 😁 Let's continue with the solution...
EC2 Elastic IP#
-
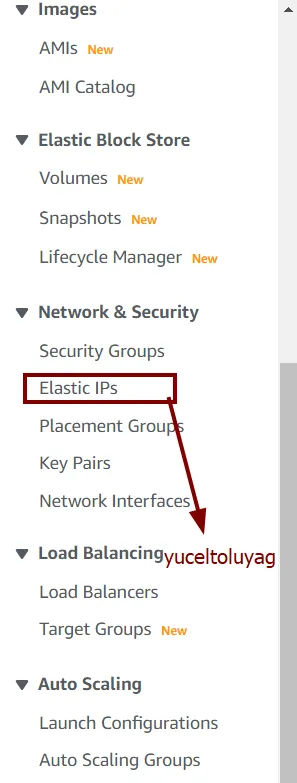
Click on Elastic IPs menu under Network & Security menu.
-
Then click Allocate Elastic IP address menu and request an IPv4 address from Amazon pool. After creating, click Associate address from the same page and select your active VPN server. If you did everything correctly, your IP address should be assigned to the elastic IP section in the instance part.

Server Settings#
Open your terminal.
sudo chmod 400 <yourfilename>.pem
-r-------- This sets the file permissions to be readable only by the user (you). It can help protect the private key from read and write operations by other users, but more importantly, it will prevent AWS from giving an error when you try to connect to your cloud server.
Now let's connect to our server:
ssh -i <yourfilename>.pem openvpnas@<elastic ip address>
The user is openvpnas, which is set by OpenVPN Access Server to allow you to connect to your instance. After connecting, you can make settings as you wish. If you do something wrong, you can change the settings through the panel. Also, if you want to reinstall, you can use the following command:
sudo ovpn-init –ec2
More detailed configuration steps related to the Installation Wizard:
          OpenVPN Access Server
          Initial Configuration Tool
------------------------------------------------------
Please enter 'yes' to indicate your agreement [no]: yes
...
Then change the password of the openvpn user:
sudo passwd openvpn
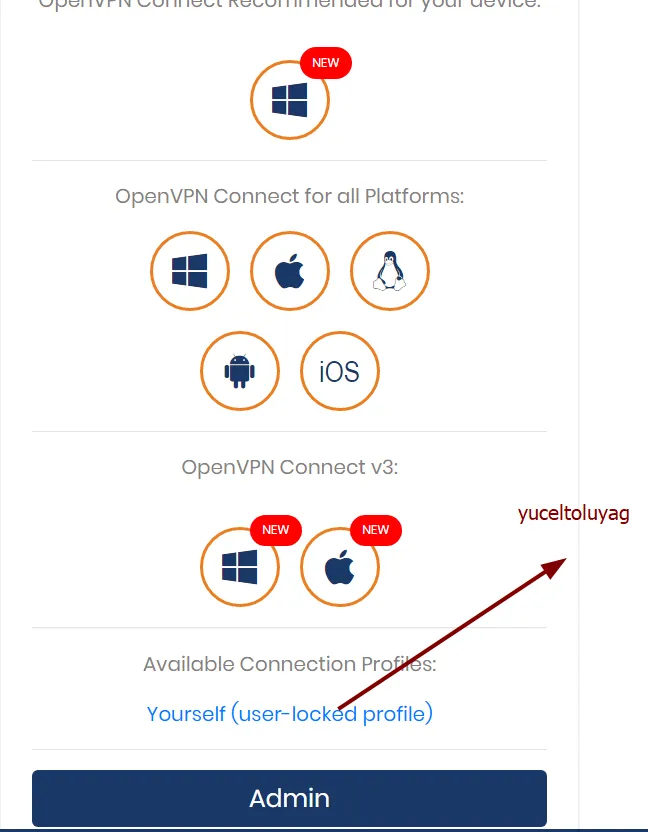
Type exit to close the SSH connection. Then you can connect to the web panel from https://elastic-ip-address:943/. If you get an SSL error, click on the advanced menu and continue.
Results#
Bonus: Cool Story Bro 🧿#
My friend always used paid VPNs. 😍 One day I bought a VPN to try it: NORDVPN 🤶🏼. At first I thought there was a regional outage at Telekom... But one day while tinkering with modem settings, what did I see 🤐 All countries were performing port scanning attacks from my modem.
[Kernel][Alert] firewall security alert! [Fragment Flooding] attack, possible.
I immediately contacted my friends at Türk Telekom, but couldn't explain my problem properly. Fortunately, I solved the problem by turning off my modem when the attack started. From this incident I learned: Whether using paid or free VPN, don't get caught by DNS Leak. Have VPN-free days!
Comments