Hello! 🌟#
While researching how to display page views on your static websites, I learned that we can use the Super Proxy library through Google Analytics to expose data externally. I found an old video from the Google team about this topic: Google Analytics Super Proxy. I found my solution by following this video. 🥰
Ingredients 🥗#
- Google Analytics Account
- Google Console Account
First Step#
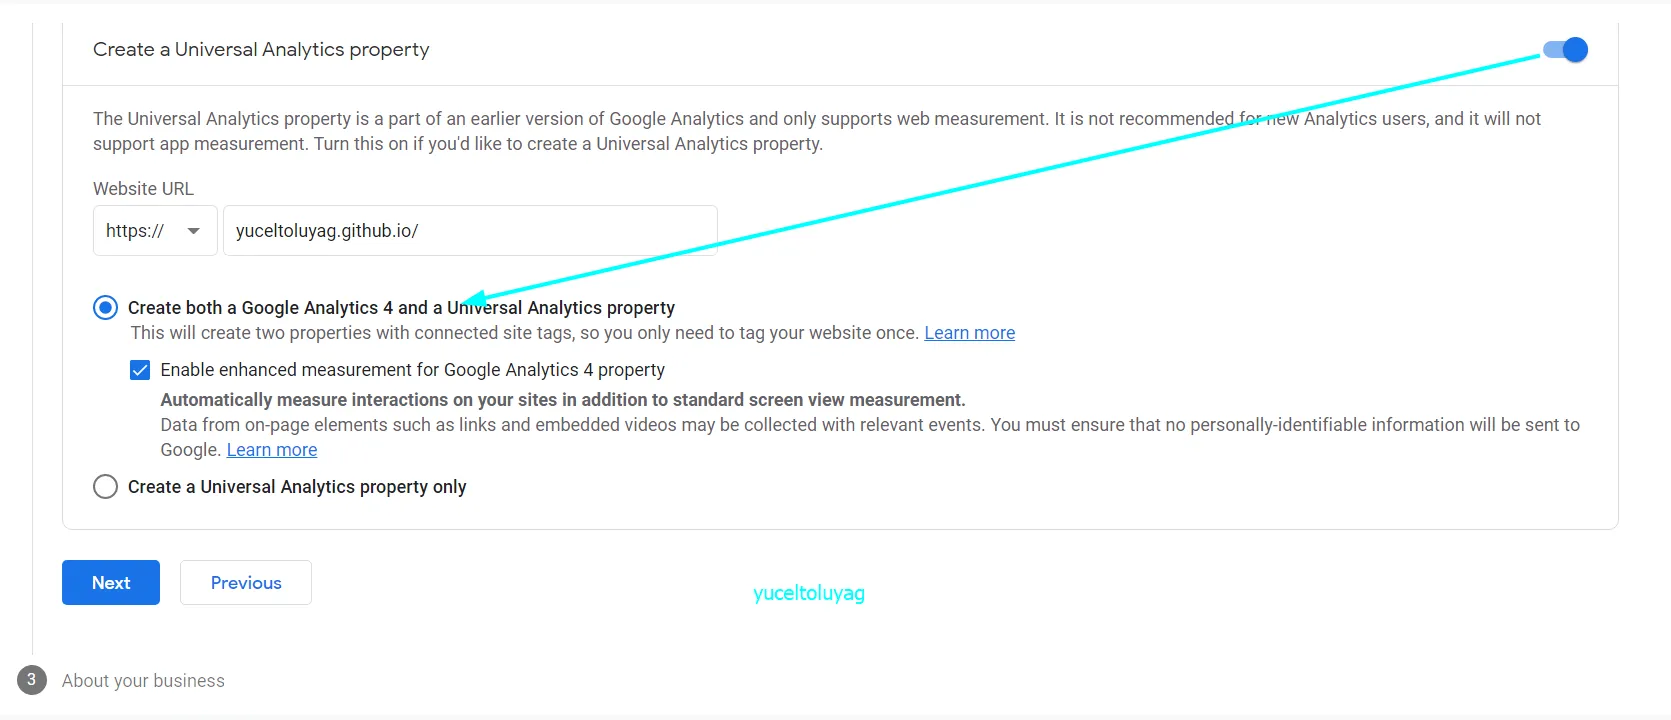
After opening your Google Analytics account, don't forget to make this setting when adding your site: Open "Create a Universal Analytics property" and check as shown in the image.
Google App Engine Setup#
- Go to Appengine site.
- Click "Create Project" option.
- Give your project a name and continue.
- Choose Python as language and "standard" as environment.
- Enable your billing account. You'll need to link your credit card, but you won't be charged as long as you don't exceed the free quota. This quota is more than sufficient for a simple blog.
- From the left menu, select APIs and Services and then click Enable APIs and Services.
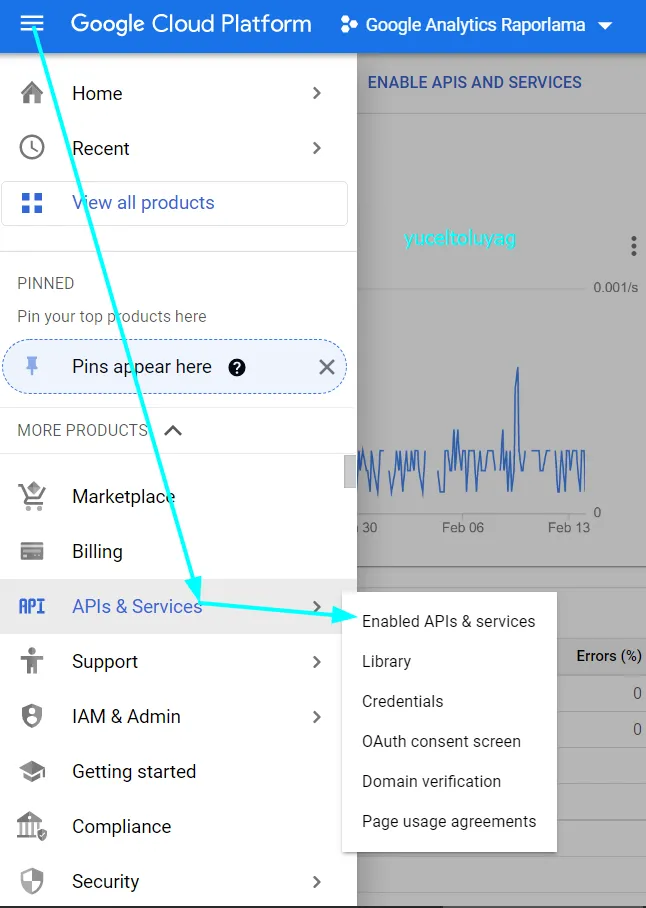
- Select
Google Analytics APIand enable the API. - In
APIs & Servicesmenu, clickOAuth consent Screenand in the popup window, check External option and continue.
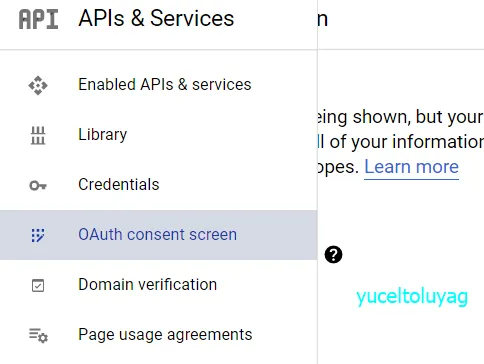
Don't add a logo when creating your project, otherwise you'll enter the approval process. There's no logo requirement anyway :)
-
Publish your project.
-
Activate
OAuth 2.0 Client IDsfromCredentialssection.
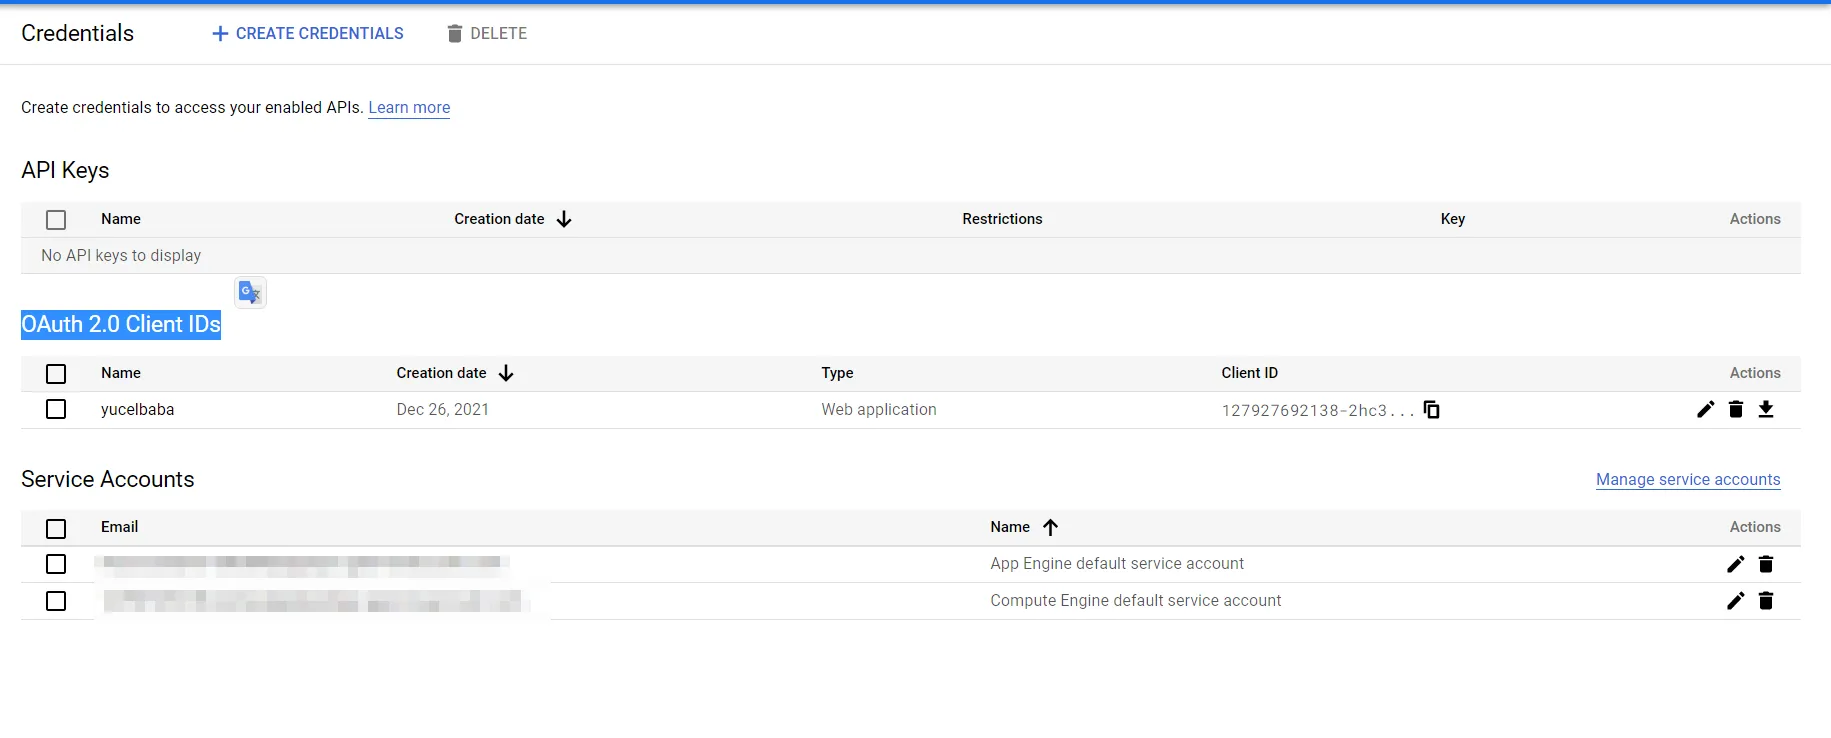
- Note down the codes created as
Client IDandClient Secret. - Click again on
Client IDand fill the following fields: - Enter the URL given after creating your project in
Authorized JavaScript originssection. - Include only
/admin/authextension inAuthorized redirect URIssection.
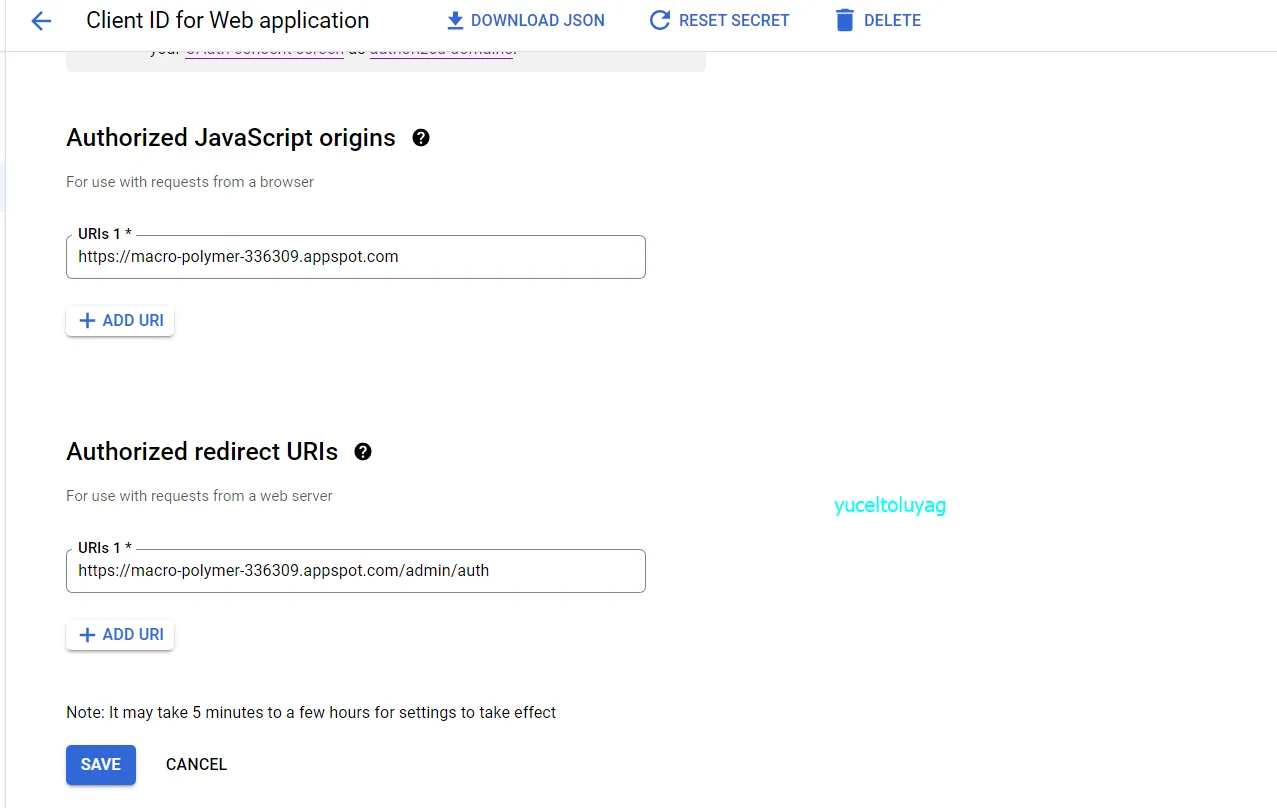
Cloud SDK#
- First, go to Google Cloud CLI and download the software suitable for your operating system.
- Then open the terminal and enter the following command:
gcloud init
Your browser will open, after the approval process you'll successfully log in. Then you can check your project information with the following command:
gcloud info
Your selected project information should be displayed here.
- Now go to google-analytics-super-proxy repository and download the files.
- Open
src/app.yamlfile with an editor and delete the following two lines at the beginning:
application: your-application-id
version: 1
Save the file.
- Open
src/config.pyfile. FillOAUTH_CLIENT_IDandOAUTH_CLIENT_SECRETsections with the Client ID and Secret you created above.
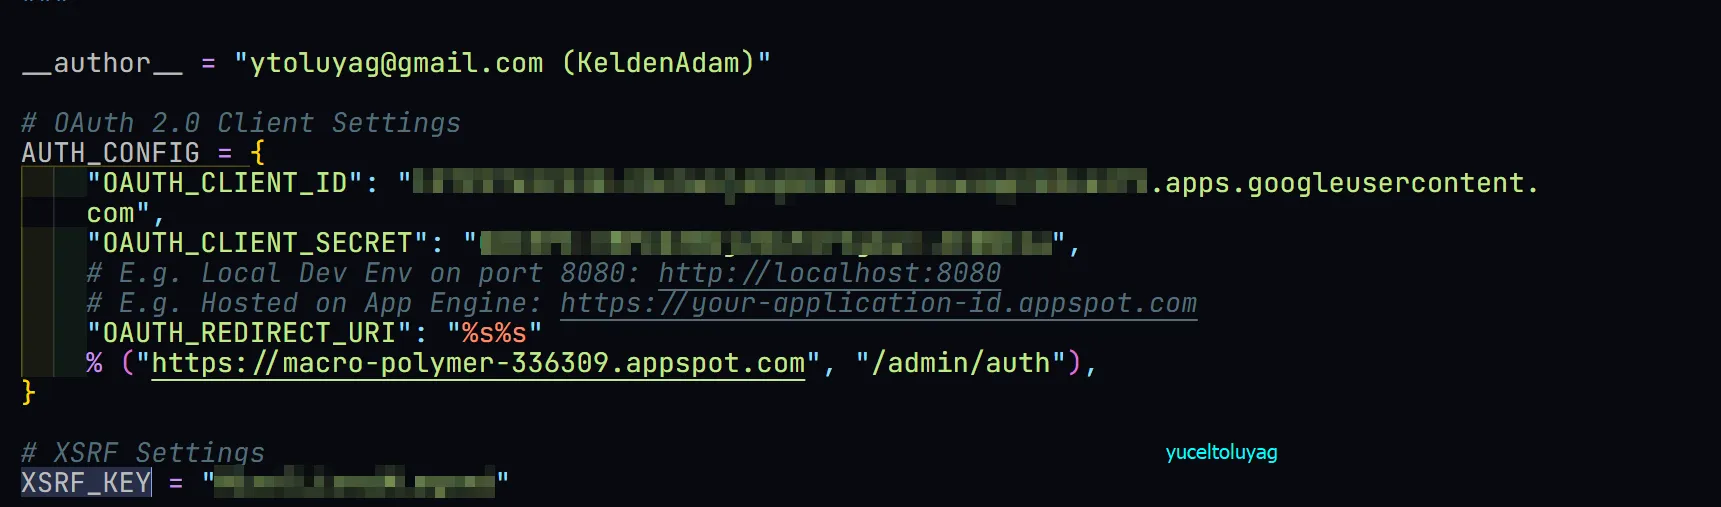
- Write a random strong password in the
XSRF_KEYsection. - Open terminal in the src folder and run the following command:
gcloud app deploy
After the process is completed, you can follow logs with the following command:
gcloud app logs tail -s default
To open your project in your browser:
gcloud app browse
Add /admin to the end of the opened link and log in to your connected Analytics account. If everything went well, you should encounter the following screen:
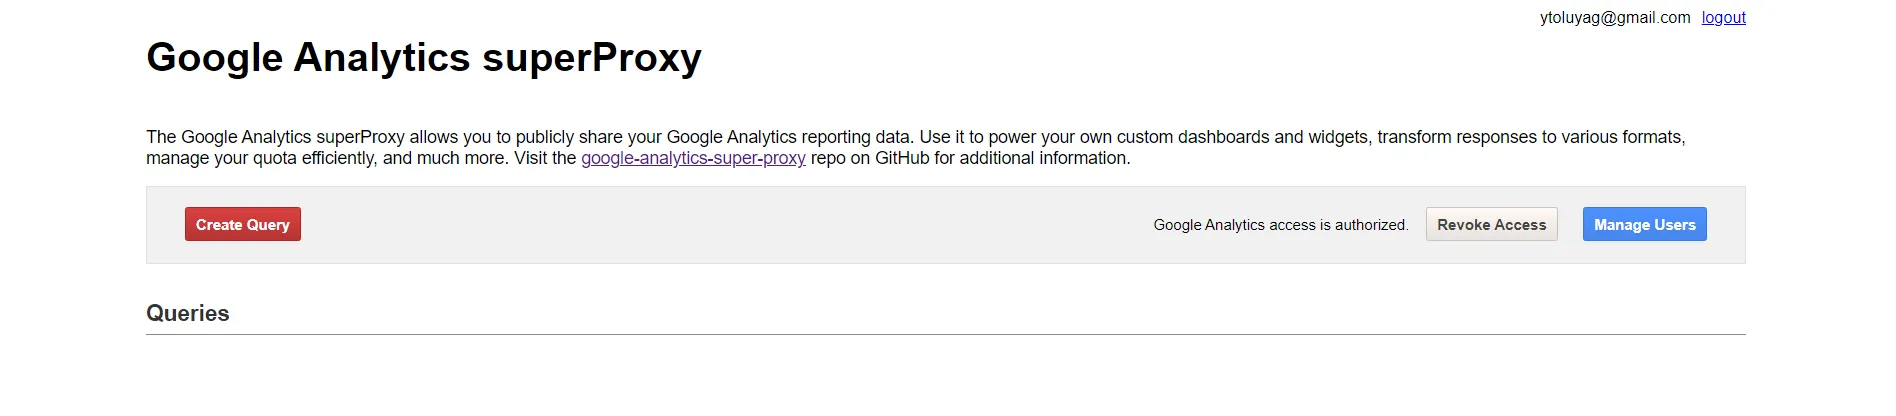
Google Analytics Query#
- Click
Create Querybutton and wait there. - Open UA Query Explorer. If you're using ad blocker extensions, don't forget to turn them off while working on this site.
- Start Date => Enter the date of your oldest post.
- End Date => Select "Today" option.
- Metrics => Select "Pageviews".
- Dimensions => Select "PagePath".
- Filters => Fill as
ga:pagePath=~^.\*/$;ga:pagePath!@=.
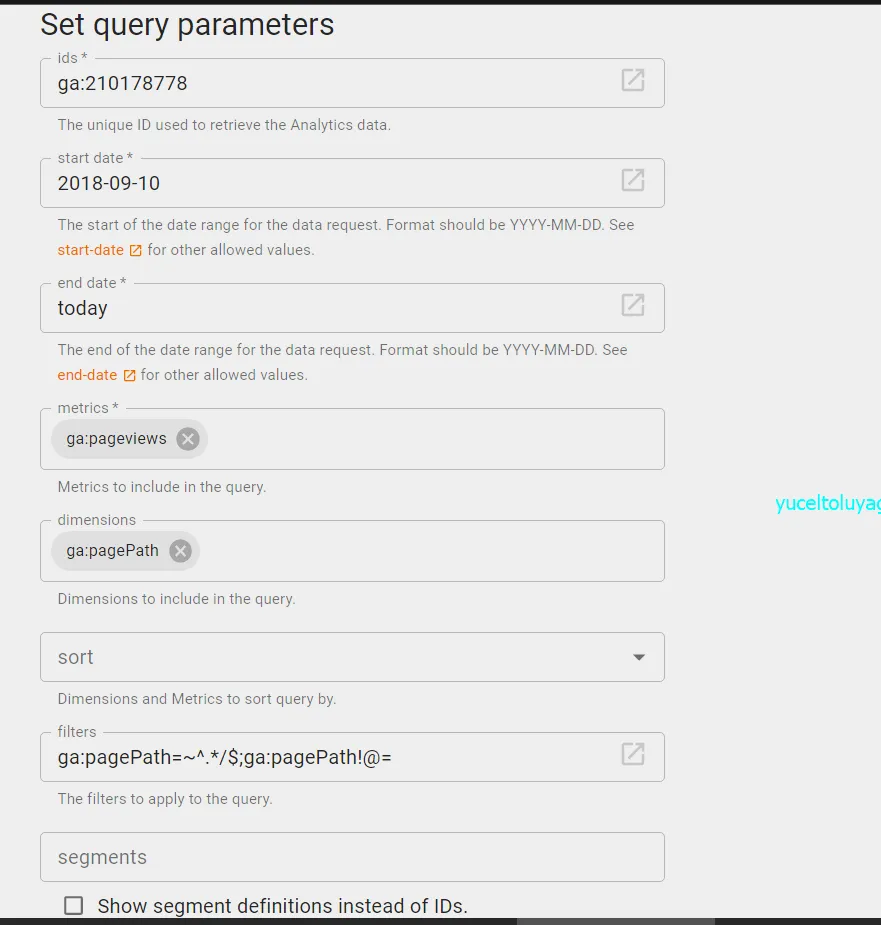
- Click
Run Querybutton and note down the generated URL. - Fill
Create Querysection as below.
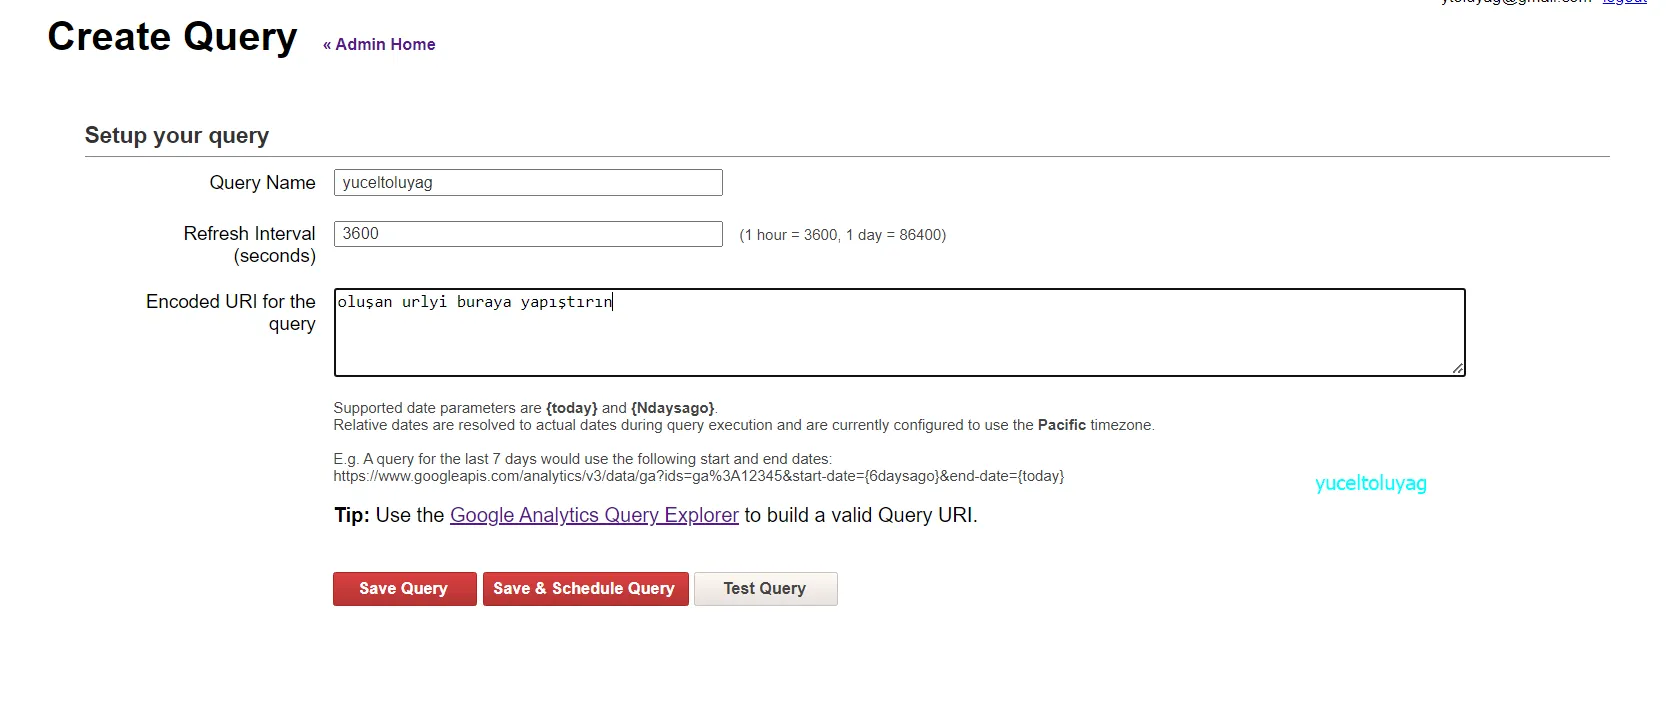
-
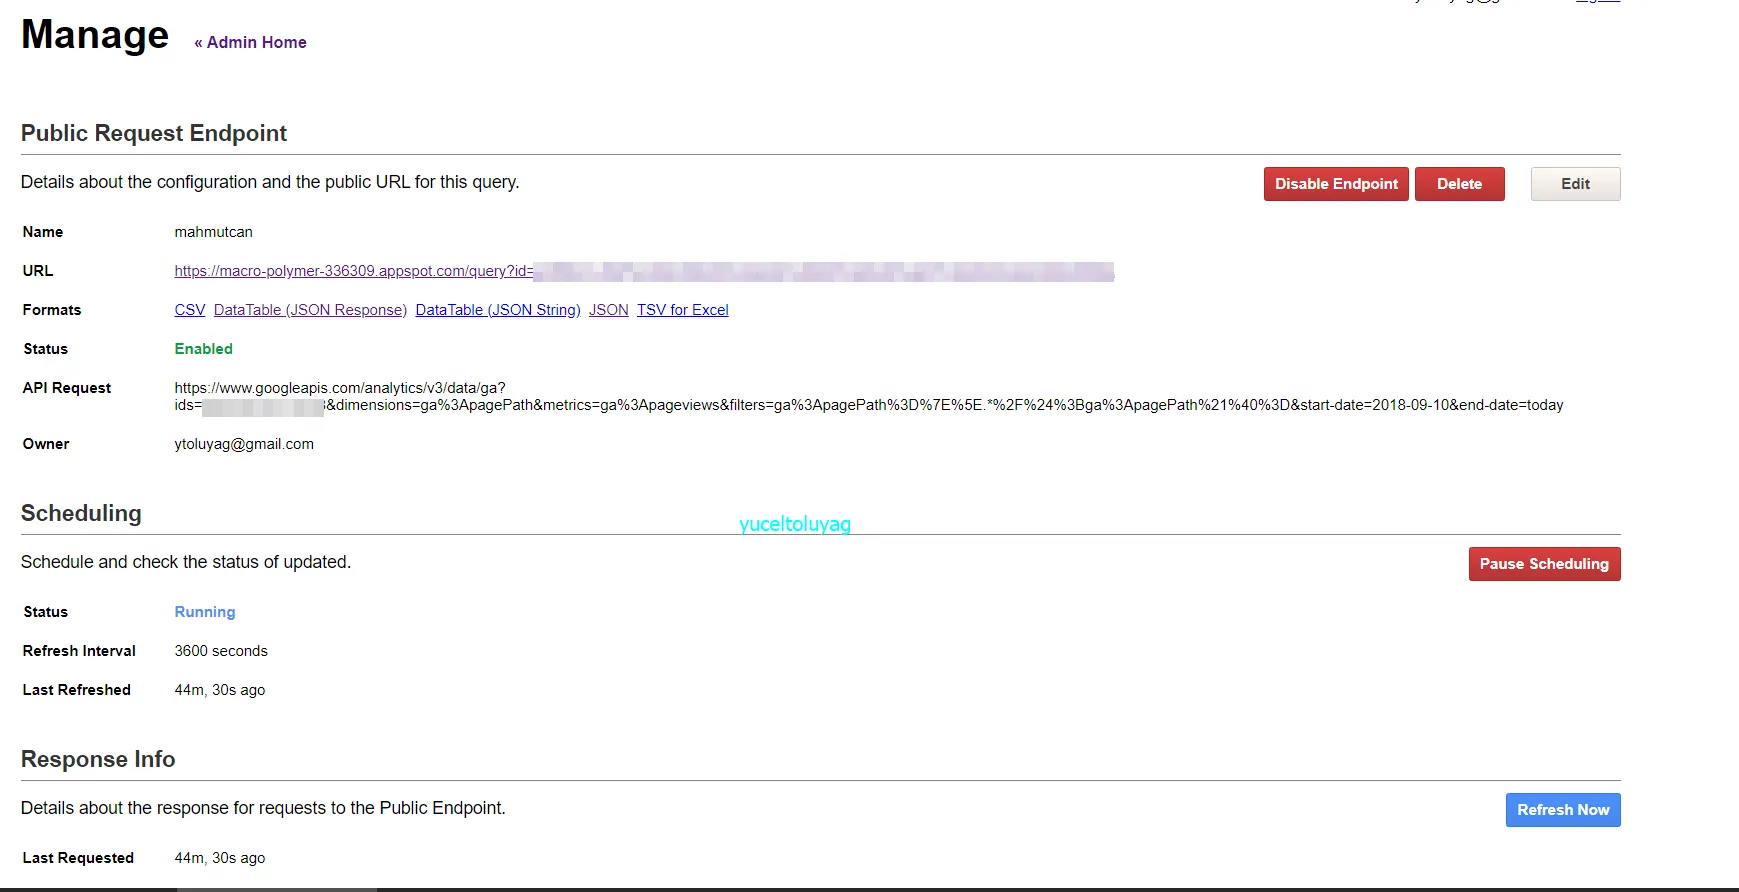
Then click
Manageoption from project section, pressEnable EndpointandStart Schedulingbuttons. Process complete! 🎉 -
Finally, after all this process is finished, the view should be as follows:
- Open your
_config.ymlfile and add the following codes:
google_analytics:
  id: "G-V6XXXXXXX" # Enter your Google Analytics ID
  pv:
    proxy_endpoint: "https://YOUR_PROJECT_ID.appspot.com/query?id=<YOUR SUPER PROXY ID>"
    cache_path: # Can be left empty due to being regional.
Filtering#
You can examine filtering variables from Core Reporting API Filters page.
Example Files#
Conclusion#
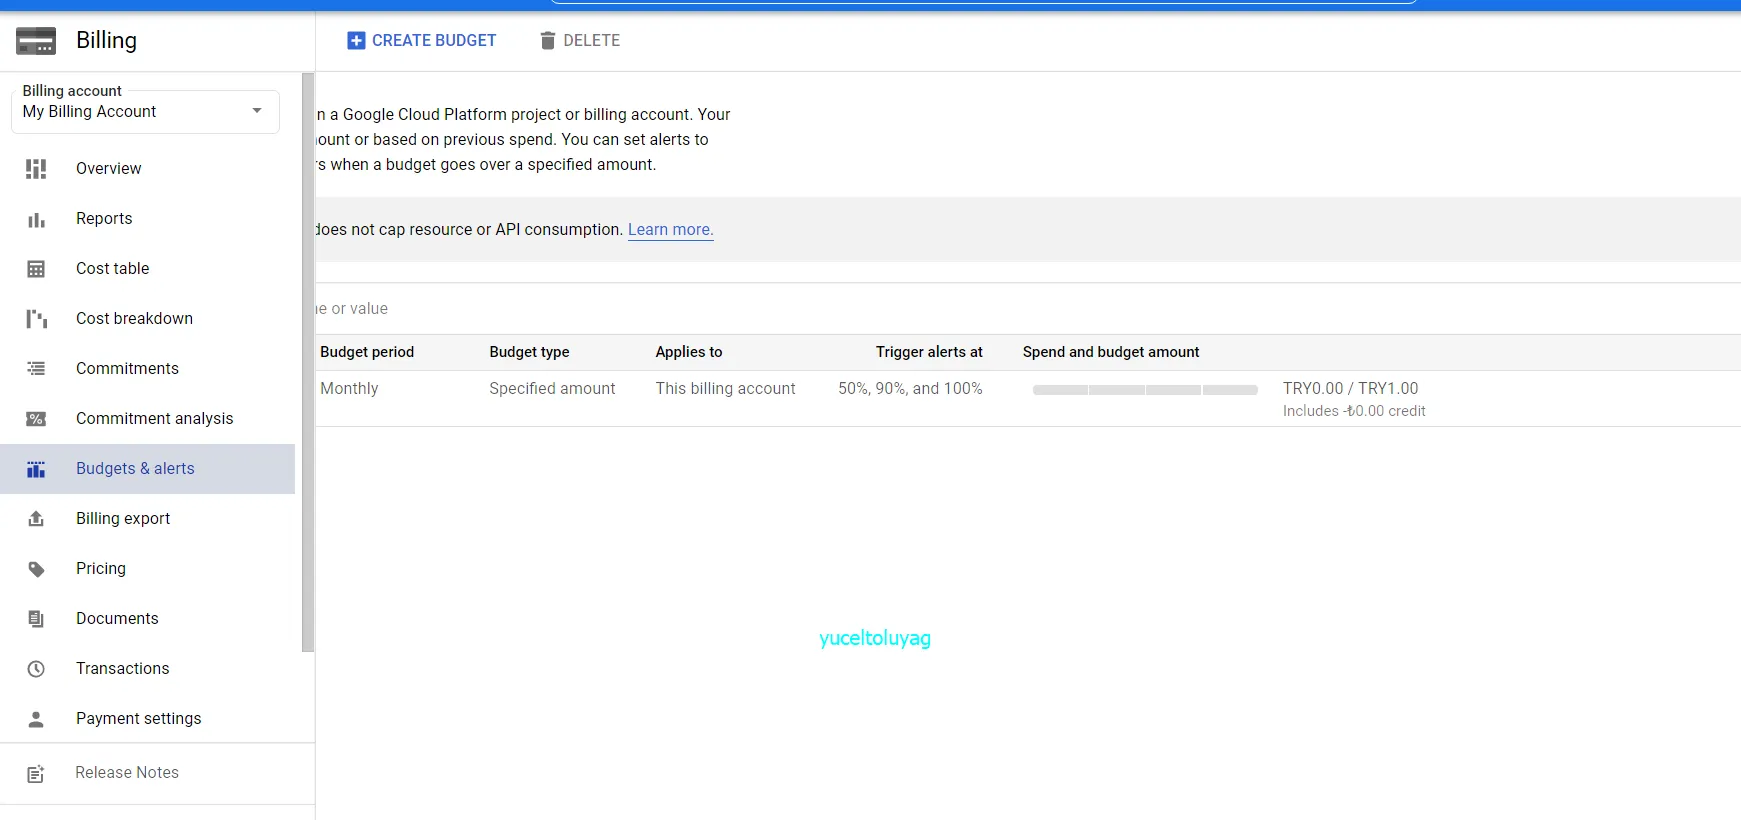
I'm using this solution on my blog. Google Console service doesn't try to charge from your card at the end of the month like Amazon which says it's free, I've been using it problem-free for seven months. Still, you can set up a payment alarm for precaution. You can go to alarms from payments section and set alarm when it exceeds 1 TL to warn me. 😉
Comments