Static Comment System with Pelican: comment-worker Installation ✨#
Dynamic comment systems have always been a problem for developers using static blog infrastructure. In this article, we will explain in detail how to integrate a comment system into a Pelican based blog using comment-worker, developed as an alternative to Staticman. ✨
What is comment-worker? 🧵#
comment-worker is a modern comment infrastructure solution that runs on Cloudflare Workers and pushes user comments to platforms like GitHub or GitLab as JSON files. It is a secure and sustainable way to add dynamic content to static sites.
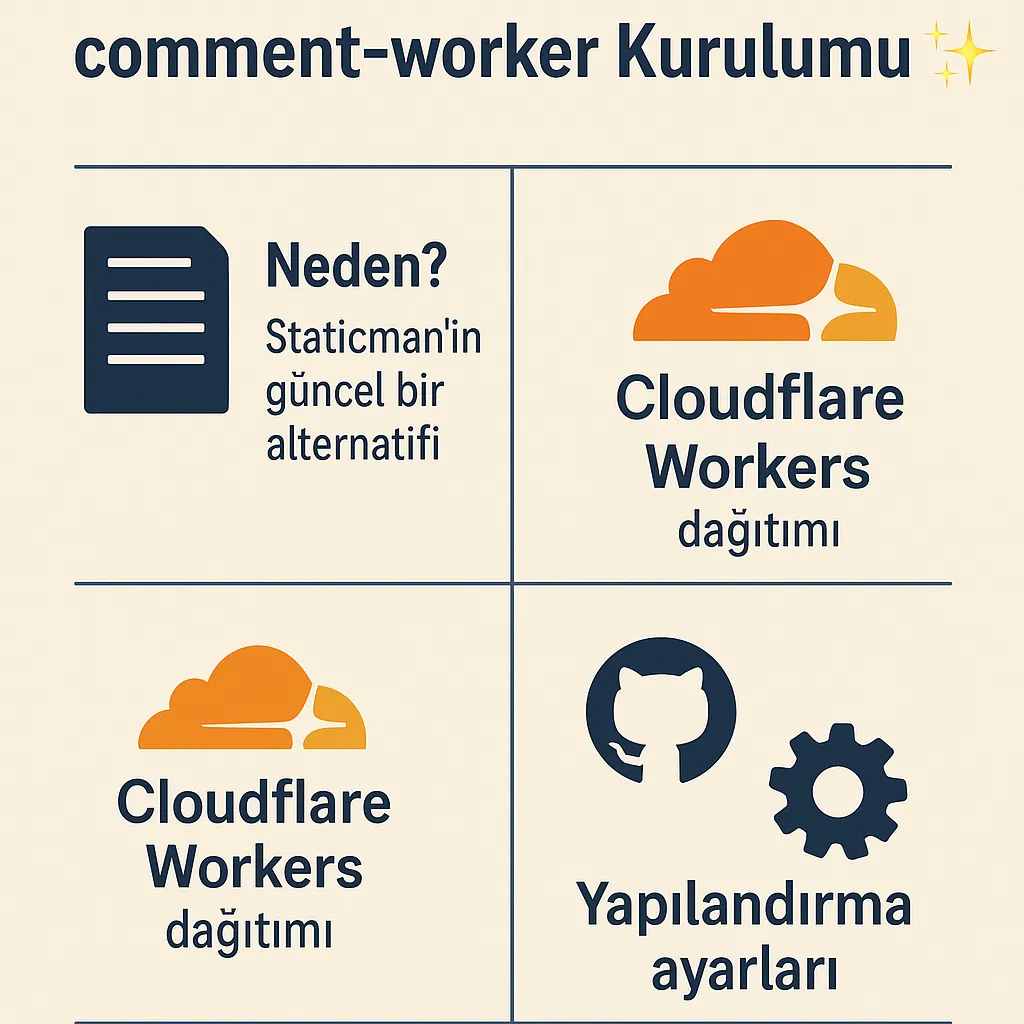
Key Features#
- ✨ Staticman API compatibility allows existing forms to be easily adapted.
- ⚡ Fast and global access with Cloudflare Workers infrastructure.
- 📦 Store comments in a version-controlled and transparent way with GitHub/GitLab integration.
- 🔒 Secure data exchange with new security improvements.
- 🧠 Easy configuration and flexibility with modern architecture.
Why comment-worker Instead of Staticman? 🤔#
- Staticman hasn't been updated for a long time (3+ years).
- Heroku's free plan was removed, making hosting expensive.
- comment-worker can be easily deployed with free platforms like Cloudflare Worker or Google App Script.
- The code was rewritten and made compatible with the
staticman.ymlfile.
Technical Improvements Made 🛠️#
- Both form and API requests supporting
application/jsonandapplication/x-www-form-urlencodedcontent types have been made compatible. - Support for transformation with algorithms like SHA1, SHA256, SHA384, SHA512 using WebCrypto has been added.
allowedOrigins, now defined as a Worker environment variable (CW_ALLOWED_ORIGINS) instead of instaticman.yml.- Simpler endpoint structure: organization, repo and branch information no longer in the URL.
pullRequestBodyproperly handles multi-line text and includes placeholder support.- Identities are now generated with
cuid2. - Zod is used for input validation and data transformations.
Missing Features ⚠️ Features not yet available: documentation, tests, JSON/frontmatter support, GitHub token auth, notifications, anti-spam, auth, generatedFields and OneDev/GitLab support. Comments now automatically include a date field.
Installation Steps 📆#
1. Creating Cloudflare Worker#
Log in to your Cloudflare account, create a new Worker and deploy the comment-worker code:
Error Case ⚠️ If you get an error, you can copy the src, package.json and wrangler.toml files from the created repository and deploy again.
To test locally:
wrangler dev
You can also review my sample project: comment-worker example
2. Installing GitHub Application#
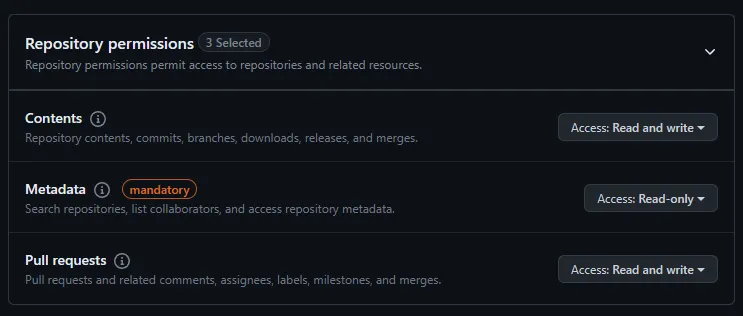
- Create a new application from the GitHub Apps page
- Define the following permissions:
- Contents: read & write
- Pull requests: read & write
3. Setting Environment Variables#
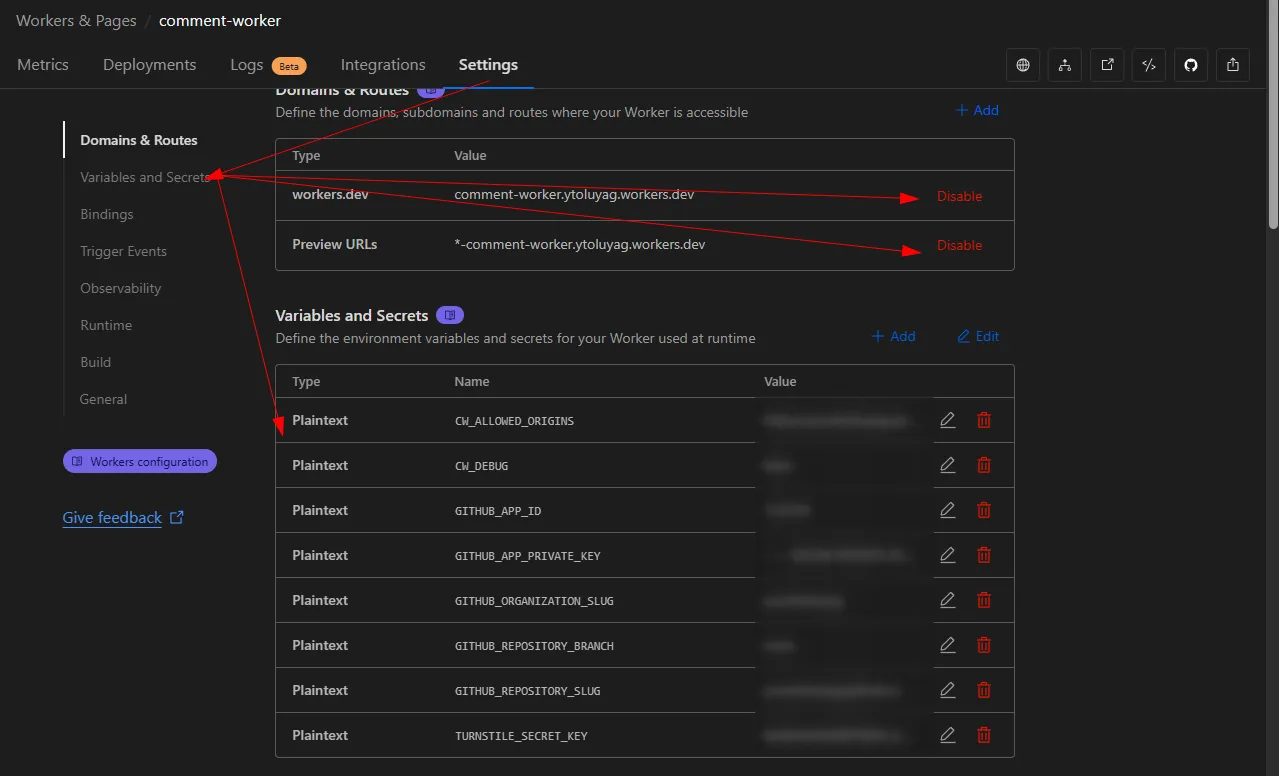
Add the following information from the Cloudflare Workers Settings section:
| key | example | description |
|---|---|---|
| GITHUB_APP_ID | 123456 | GitHub Application ID |
| GITHUB_APP_PRIVATE_KEY | -----BEGIN PRIVATE KEY-----... | GitHub Private Key |
| GITHUB_ORGANIZATION_SLUG | github username | Organization or username |
| GITHUB_REPOSITORY_SLUG | yuceltoluyag.github.io | Repository to push comments |
| GITHUB_REPOSITORY_BRANCH | main | Target branch |
| CW_ALLOWED_ORIGINS | https://example.com, https://www.example.com | CORS whitelist |
| CW_DEBUG | true / false | Debug mode |
| TURNSTILE_SECRET_KEY | https://developers.cloudflare.com/turnstile/get-started/ | Im Not Human : ) |
Debug Mode CW_DEBUG should be set to true initially. This way you can easily see the problems.
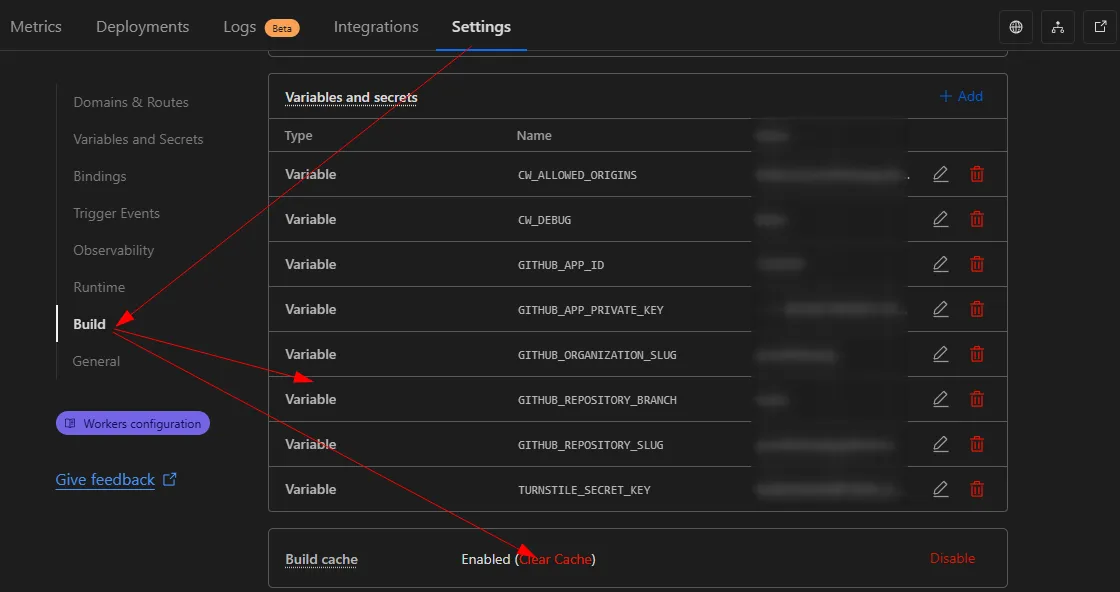
Don't forget to define the same env variables in the Build settings:
Converting Private Key to PKCS8 Format 🔐#
openssl pkcs8 -topk8 -inform PEM -outform PEM -nocrypt -in private-key.pem -out private-key-pkcs8.key
4. Adding staticman.yml File 📄#
Add a staticman.yml file to the repository root directory as follows:
comments:
  allowedFields: [name, email, message]
  branch: main
  filename: "comment-:year:month:day-:slug"
  format: "yaml"
  moderation: true
  path: "data/comments/{options.slug}"
5. Add Comment Form to Your Pelican Theme ✏️#
<form
  submit="https://your-worker-subdomain.workers.dev/api/handle/form"
  method="POST"
>
  <div>
    <label for="fields[name]">Name</label>
    <input type="text" name="fields[name]" value="John Doe" required>
  </div>
  <div>
    <label for="fields[email]">Email</label>
    <input type="email" name="fields[email]" value="" required>
  </div>
  <div>
    <label for="options[url]">Website</label>
    <input type="url" name="options[url]" placeholder="https://example.com">
  <div>
    <label for="fields[message]">Message</label>
    <textarea name="fields[message]" required>Hello world!</textarea>
  </div>
  <div style="display: none">
    <label for="fields[slug]">Slug</label>
    <input type="text" name="fields[slug]" value="your/page/slug" readonly>
  </div>

  <button type="submit">Submit</button>
  <button type="reset">Reset</button>
</form>
6. Specifying Content Type in API Requests#
There's an important point to note when sending data to the API. The system accepts two different formats:
- Form data format (
application/x-www-form-urlencoded) - The format you're familiar with from HTML forms
- Data is sent as
name=value&other=another value - Example:
username=ahmet&password=123456 - JSON format (
application/json) - Data is sent as an object
- Example:
{"username": "ahmet", "password": "123456"}
Important: No matter which format you use, you must specify this in the Content-Type header of your request. The API doesn't automatically detect the data format. You must explicitly specify the format you're using.
Sample Request#
POST /api/endpoint HTTP/1.1
Content-Type: application/json

{"username": "ahmet", "password": "123456"}
Or with the other format:
POST /api/endpoint HTTP/1.1
Content-Type: application/x-www-form-urlencoded

username=ahmet&password=123456
If you don't pay attention to this rule when sending your request, the API will most likely give errors.
{
  "fields": {
    "name": "John Doe",
    "email": "johndoe@example.com",
    "message": "Hello world!",
    "slug": "your/page/slug"
  },
  "options": {
    "url": "https://example.com"
  }
}
Conclusion 🌟#
comment-worker now offers an easy and modern solution for integrating a dynamic comment system into your Pelican blog. Thanks to Cloudflare Workers, you can achieve a fast, scalable and free structure worldwide.
Make your blog more interactive with comments from your readers and grow your community! 🚀💬
Comments