Series: Android Rehberleri
Part 2/2📱 Installing Custom ROM on Redmi Note 8 Pro: Step-by-Step Guide on Arch Linux#
Important ⚠️ Warning! These operations are risky and may cause irreversible problems on your device. Applying the steps described in this guide is entirely at your own risk. In case of any problems, the content owner cannot be held responsible.
Warning 📱 Important data on your phone (applications, settings, files, etc.) may be lost during the process. Be sure to take backups before the operation and back up your important files.
🔧 I am a Redmi Note 8 Pro user and I applied this guide on my own device.
Critical Warning /mediatek-imei-onarma-rehberi/ Complete the steps at this address without missing any before proceeding with this operation! IMEI backup/repair operations must be done before ROM installation.
🔍 Introduction#
Installing custom ROMs on Android devices is a popular method to increase performance and get rid of manufacturer software restrictions. Especially on MediaTek-based devices like Redmi Note 8 Pro, this process requires some special steps. In this guide, we will explain step by step how to install custom ROM on Redmi Note 8 Pro on Arch Linux environment, how to protect your IMEI information and solutions to problems you may encounter. ⚠️ Remember, these operations may cause data loss on your device, so make sure you have backed up all your important data!
🛠️ Preparations#
Installing ADB and Fastboot#
First, you need to install the necessary tools to communicate with your device. Open terminal on Arch Linux and run the following command:
sudo pacman -S android-tools
Enabling USB Debugging#
Make sure the Settings > Developer Options > USB debugging option is active on your device. To see developer options, you may need to tap Settings > About Phone > Build Number 7 times.
Checking Device Connection#
Connect your device to your computer via USB and run the following command in terminal:
adb devices
If your device appears in the list, the connection is successful. 🟢
💾 Taking IMEI Backup#
Important Taking IMEI backup is critical! If IMEI is lost while installing ROM, your device cannot find network.
Learning IMEI Information#
You can learn your IMEI number by running the following commands in terminal: MediaTek IMEI Repair Guide is explained in detail here. It automatically backs up, but you can also take manual backup. It may be needed in the future.
adb shell
service call iphonesubinfo 1
exit
Alternatively:
adb shell dumpsys iphonesubinfo
Or:
adb shell getprop | grep imei
Sample output:
[ro.ril.miui.imei0]: [xxxxxxxxxx]
[ro.ril.miui.imei1]: [xxxxxxxxxxx]
This only shows IMEI numbers. If you have dual SIM cards on your device, note down the IMEI numbers of both cards. This method does not apply patch process. Please use method 1.
Taking NVRAM Backup (Root Required)#
Taking NVRAM backup usually requires root access. If you don't have root access, you can backup by noting your IMEI numbers. You can examine the article at MediaTek IMEI Repair Guide address.
🔓 Unlocking Bootloader#
This operation will delete all data on your device! Make sure you have backed up your important data.
Entering Bootloader Mode#
To put your device into bootloader mode:
adb reboot bootloader
sample output:
[friday13@baba ~]$ adb reboot bootloader
[friday13@baba ~]$ fastboot devices
kvqcxo4xkr59oflf      fastboot
Checking Bootloader Lock Status#
To check the status of the lock:
fastboot getvar unlocked
If the output is unlocked: yes, your lock is already open. If unlocked: no, you need to open it.
sample output:
[friday13@baba ~]$ fastboot getvar unlocked
unlocked: yes
Finished. Total time: 0.000s
Unlocking Bootloader#
For Xiaomi devices:
fastboot flashing unlock
Or:
fastboot oem unlock
When prompted on your device, confirm with the volume keys.
🔄 Installing Custom Recovery (TWRP)#
Download the TWRP recovery image suitable for your device. For Redmi Note 8 Pro, usually twrp.img file is used.
Flashing Recovery Image#
To flash the downloaded image:
fastboot flash recovery twrp.img
sample output:
fastboot flash recovery Downloads/recovery.img
Sending 'recovery' (65536 KB)                      OKAY [  1.513s]
Writing 'recovery'                                 OKAY [  0.396s]
Finished. Total time: 1.910s
Starting Recovery Mode#
After the flash process, start the device in recovery mode:
fastboot reboot recovery
Alternatively:
adb reboot recovery
📦 Installing Custom ROM#
Complete Cleaning#
In TWRP menu:
- Enter Wipe option
- Select Advanced Wipe
- Mark the following:
- System
- Data
- Cache
- Dalvik/ART Cache
- Confirm with Swipe to Wipe
ROM Installation Methods#
Method 1: Using ADB Sideload#
Sideload is the most reliable method when you have file transfer problems.
In TWRP:
- Enter Advanced > ADB Sideload option
- Confirm with Swipe to Start Sideload
- Run the following command on PC:
adb sideload "/path/to/rom.zip"
Method 2: Manual Installation#
- Copy ROM file to device:
adb push "/path/to/rom.zip" /sdcard/
- Enter Install option in TWRP
- Select ROM file
- Start installation with Swipe to Confirm Flash
Format Data Operation#
After ROM installation:
- Enter Wipe > Format Data option
- Type
yesand confirm - Restart device with Reboot System
⚠️ Encountered Problems and Solutions#
"Failed to Mount Metadata" Error#
This error is caused by the metadata section not being able to mount in Android 10+ versions.
Solution:
- Enter Advanced > Partition Manager option in TWRP
- Select metadata section
- Use Repair or Format option
- After the process is completed, restart recovery with Reboot Recovery
"Required Key Not Available" Error#
This error is caused by file writing restrictions in Android 11+ versions. You may encounter this especially when trying to copy ROM files to /sdcard/ directory.
[friday13@baba ~]$ adb push /home/friday13/Downloads/Telegram\ Desktop/crDroid.zip  /sdcard/
adb: error: failed to copy '/home/friday13/Downloads/Telegram Desktop/crDroid.zip' to '/sdcard/crDroid.zip': remote couldn't create file: Required key not available
/home/friday13/Downloads/Telegram Desktop/crDroid.zip: 1 file pushed, 0 skipped. 36.9 MB/s (1636720497 bytes in 42.274s)
Caused by file writing restrictions in Android 11+ versions.
Solution:
- Try copying to
/data/media/0/directory:
adb push "/path/to/rom.zip" /data/media/0/
- Or use sideload method (recommended)
"Corrupted NVRAM" Error#
This error is caused by corruption of NVRAM section especially on MediaTek devices.
Solution:
- First complete ROM installation
- Download a special zip file for IMEI repair (mtk_imei script) MediaTek IMEI Repair Guide
- Flash this zip file from TWRP
- Restart device and check your IMEI numbers
📋 Summary Table#
| Operation | Command / Method | Notes |
|---|---|---|
| ADB Check | adb devices |
Verify that the device is connected |
| Learning IMEI | adb shell getprop \| grep imei |
Note down IMEI numbers |
| Unlocking Bootloader | fastboot flashing unlock |
Deletes all data! |
| Flashing TWRP | fastboot flash recovery twrp.img |
Use image suitable for device |
| Installing ROM | adb sideload rom.zip |
Most reliable method |
| Cleaning Data | TWRP > Advanced Wipe | Select System, Data, Cache |
| NVRAM Repair | flashing mtk_imei script | Do after ROM installation |
🎯 Conclusion#
Installing custom ROM on Redmi Note 8 Pro involves several critical steps. Especially paying attention to IMEI backup and unlocking bootloader operations is vital for the usability of your device. After successfully completing these operations in Arch Linux environment, you can install the custom ROM you want and increase the performance of your device. Remember, these operations always carry risks, so follow all steps carefully and be prepared for possible problems. 🚀
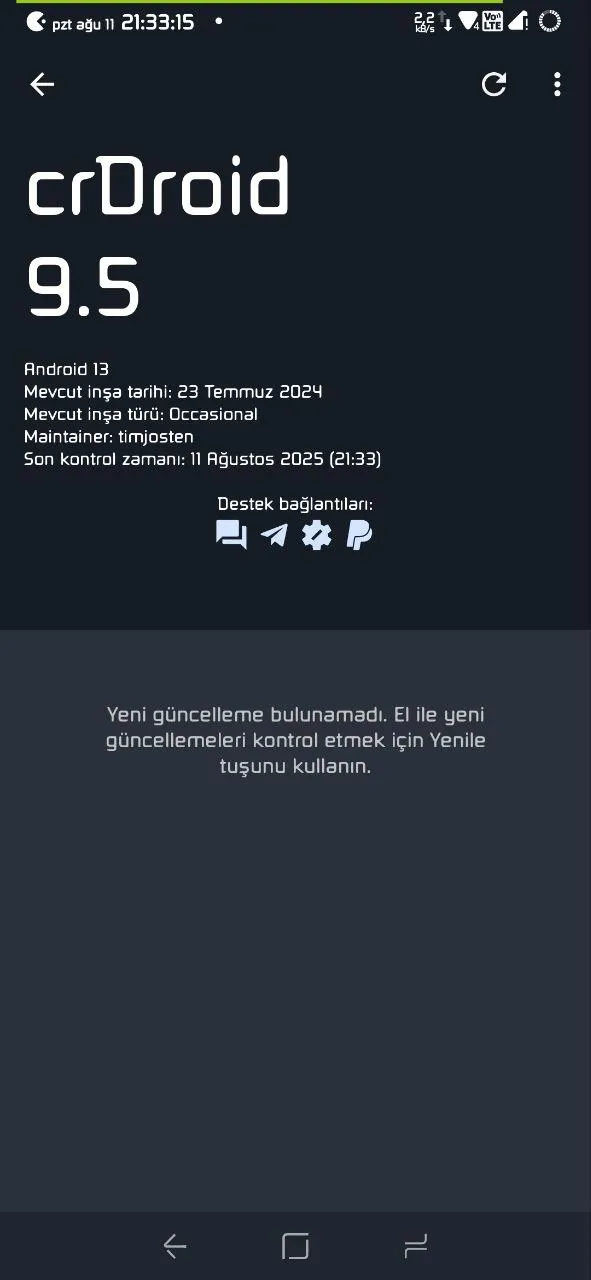
After successfully installing ROM, you can start exploring the new features of your device. If you encounter any problems, don't hesitate to share them with us in the comments!
# Listing USB devices
[friday13@baba ~]$ lsusb
Bus 001 Device 001: ID 1d6b:0002 Linux Foundation 2.0 root hub
Bus 001 Device 002: ID 2a7a:8a47  CASUE USB KB
Bus 001 Device 003: ID 292b:f115 USB 2.0 USB Audio Device
Bus 001 Device 004: ID 10c4:8108 Silicon Labs USB OPTICAL MOUSE
Bus 001 Device 021: ID 18d1:4ee7 Google Inc. Nexus/Pixel Device (charging + debug)
Bus 002 Device 001: ID 1d6b:0003 Linux Foundation 3.0 root hub
Bus 001 Device 021: ID 18d1:4ee7 Google Inc. Nexus/Pixel Device (charging + debug) Vendor ID appears as 18d1 (Google Inc.) here
Comments