Activating .htaccess on XAMPP (Illustrated Guide)#
While working on localhost, the .htaccess file provides great convenience in many matters such as SEO settings, hotlink prevention, custom error pages, and traffic control.
In this post, I will show you step-by-step how to activate the .htaccess file using XAMPP.
1️⃣ Enabling the Apache Mod Rewrite Module#
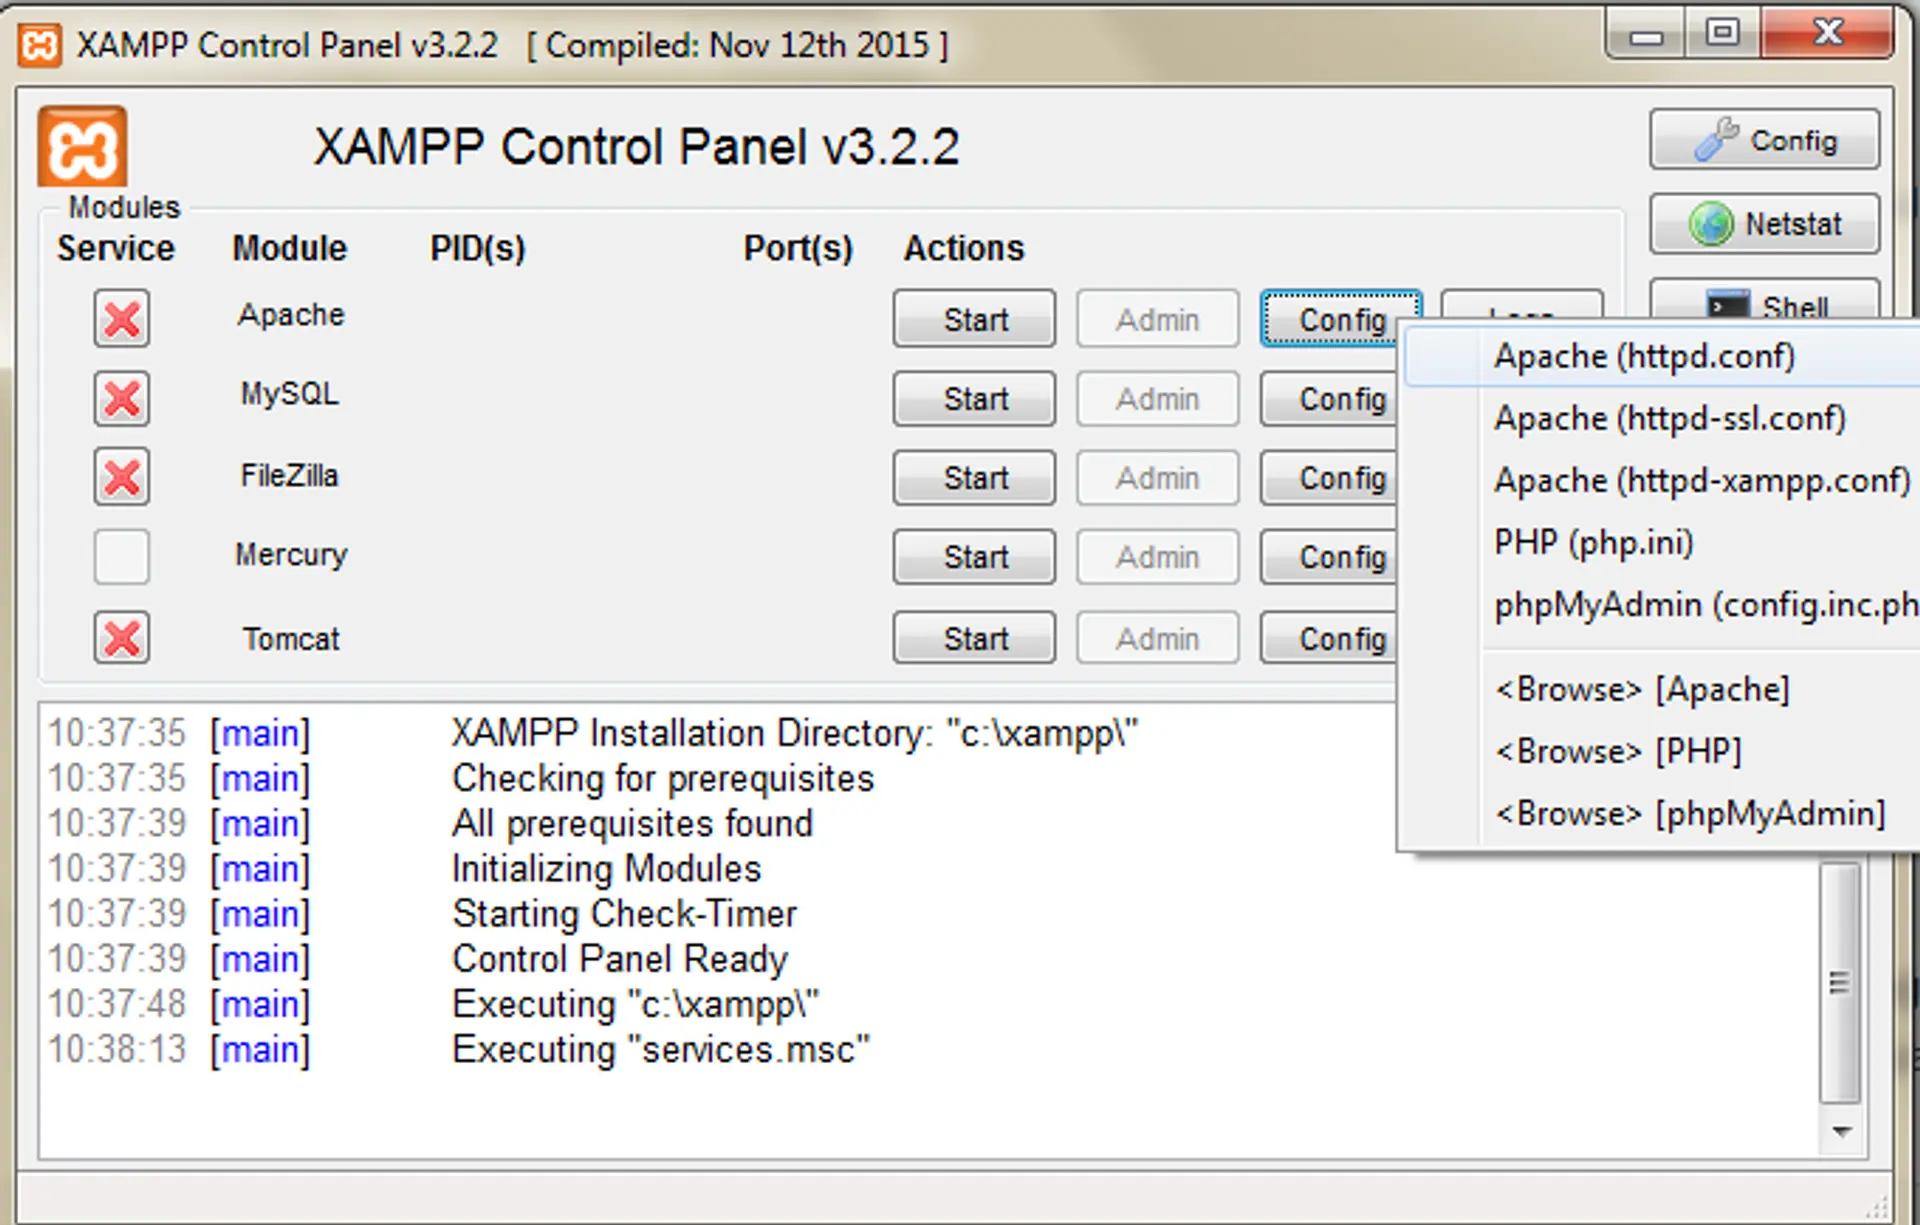
- Open the XAMPP Control Panel.
- Click the Config button located to the right of the Apache line.
- Select the httpd.conf file from the opening menu.
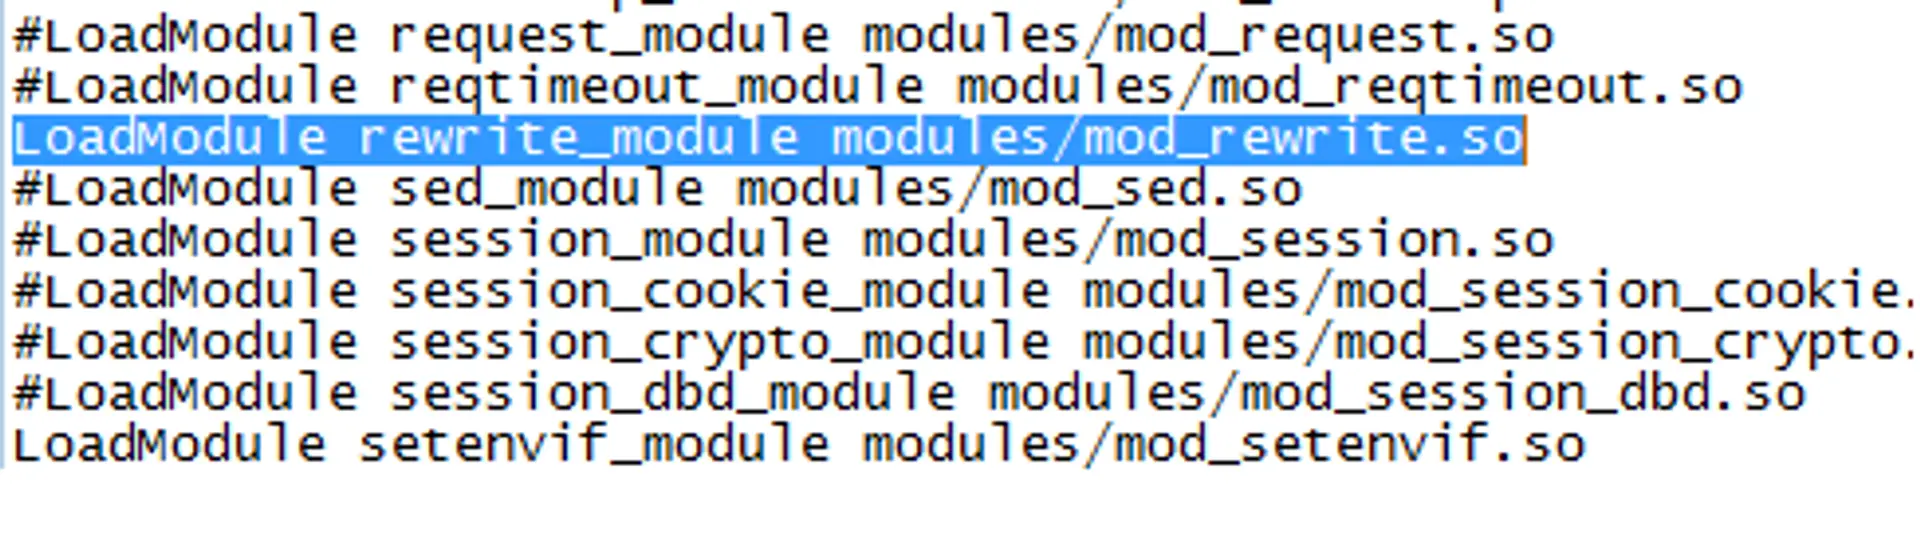
🧩 Then find the following line:
#LoadModule rewrite_module modules/mod_rewrite.so
Remove the
#(hash) sign at the beginning:
LoadModule rewrite_module modules/mod_rewrite.so
This process allows URL redirection and rewriting operations to work.
2️⃣ Changing the AllowOverride Setting#
Find the following lines in the same file:
AllowOverride None
and change them as follows:
AllowOverride All
This change allows the
.htaccessfile to work actively.
3️⃣ Restart Apache and MySQL Services#
For the changes you made to take effect: Return to the XAMPP panel and restart Apache and MySQL services by clicking Stop → Start.
4️⃣ Sample .htaccess File#
Now your .htaccess file is active!
To try it, create a .htaccess file in the root directory and add the following code:
# Activates redirections
RewriteEngine On

# Example: redirect non-www to www
RewriteCond %{HTTP_HOST} ^example\.com [NC]
RewriteRule ^(.*)$ http://www.example.com/$1 [L,R=301]
🧠 Additional Information#
- The
.htaccessfile works on Apache servers. - The filename must start with a dot (.) and must not have a file extension.
- After editing the file, don't forget to clear the browser cache.
Good luck 😉
Now your .htaccess file is working with full functionality on XAMPP.
Comments